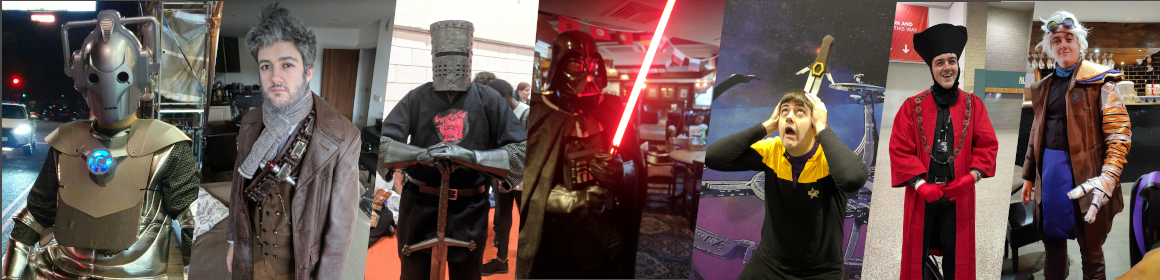
So I decided somewhat last minute to go along to the London Film and Comic Con in Spring 2023. With Destination Trek later in the year in mind, I figured I could make a Trek costume which I could refine and reuse for that convention. I’ve had a bit of experience making Deep Space Nine/Voyager style uniforms for Destination Star Trek 2019, and had found the process straightforward enough that I reckoned I could make a teal medical/science version within the time available.
The method I used for the uniform involved sourcing a long sleeve black top to serve as a base and a teal t-shirt from which I would cut the shoulders. I already had a metal voyager-style pin badge as well, and the EMH doesn’t have a rank so no need for rank pips.
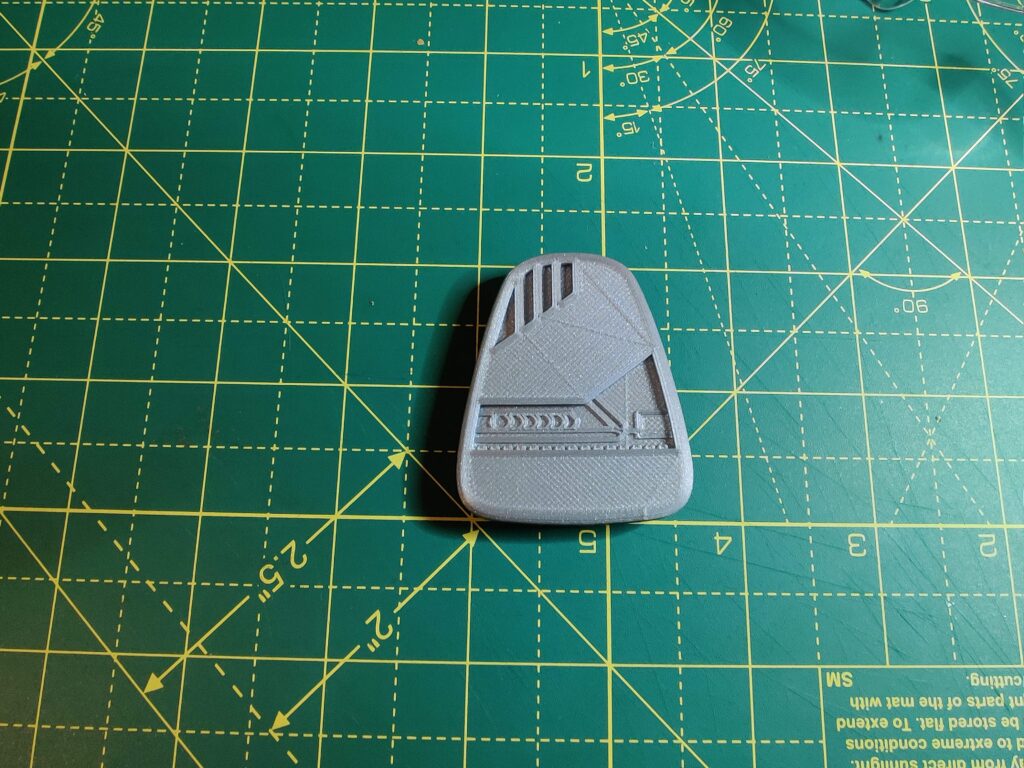
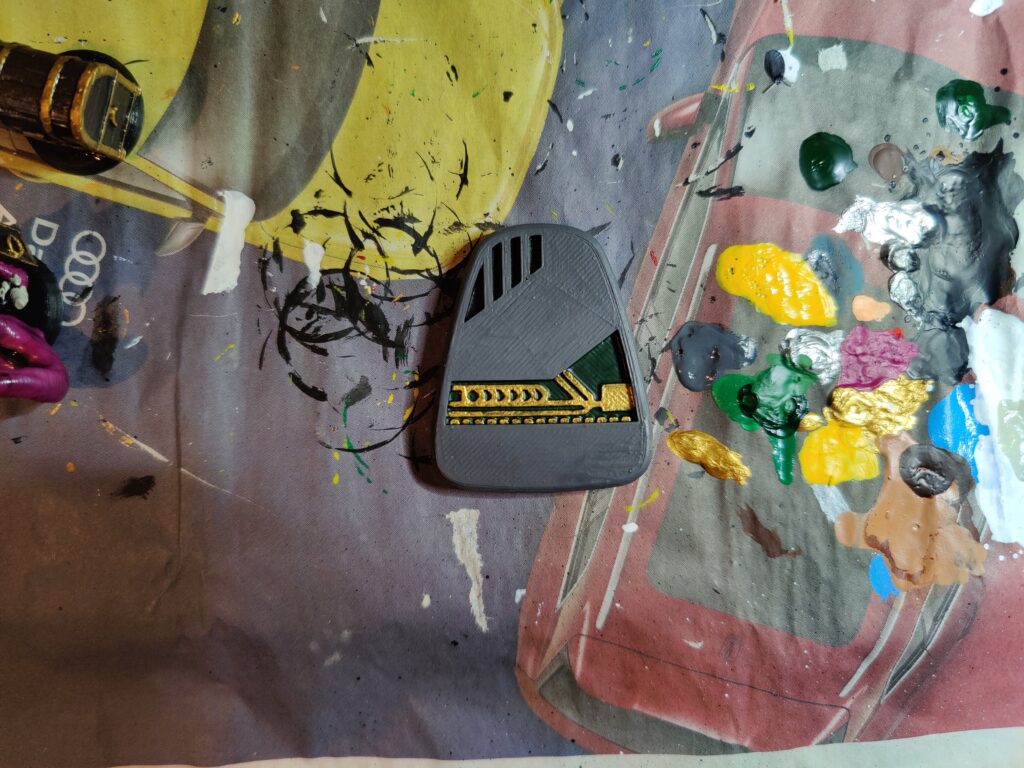
Of course an EMH outside of sickbay requires a Mobile Emitter, and thanks to the wonders of the internet and 3D printing it took me minutes to find an STL file and a few hours to print and paint it.
Magnetic Mobile Emitter printedAnd painted
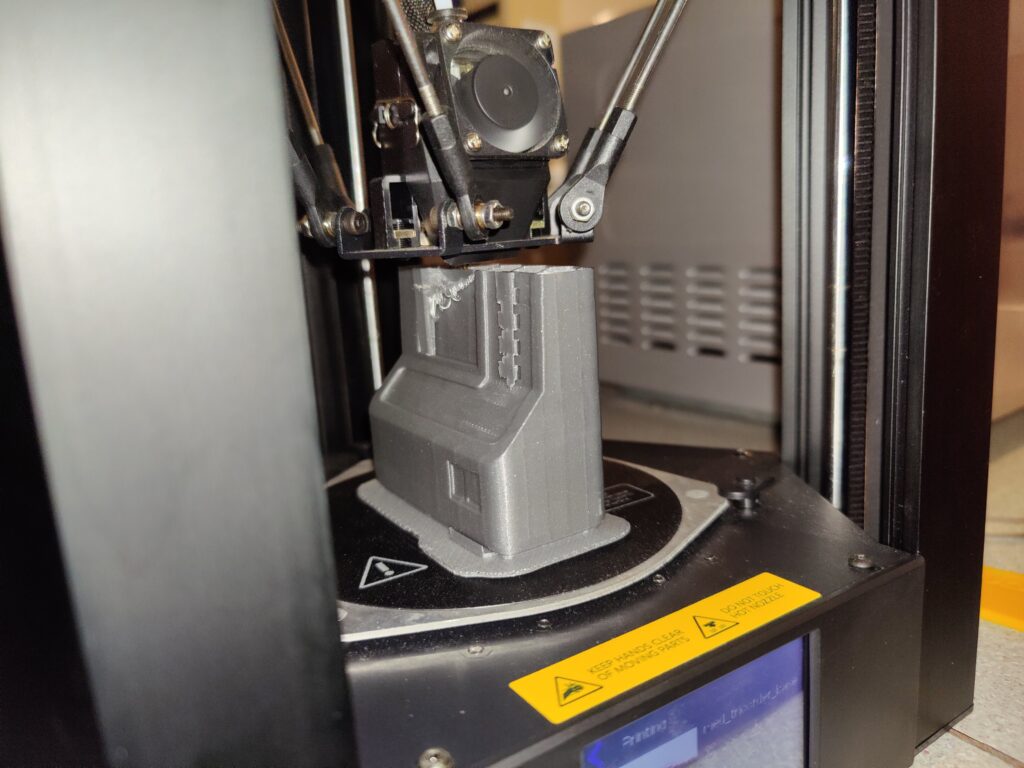
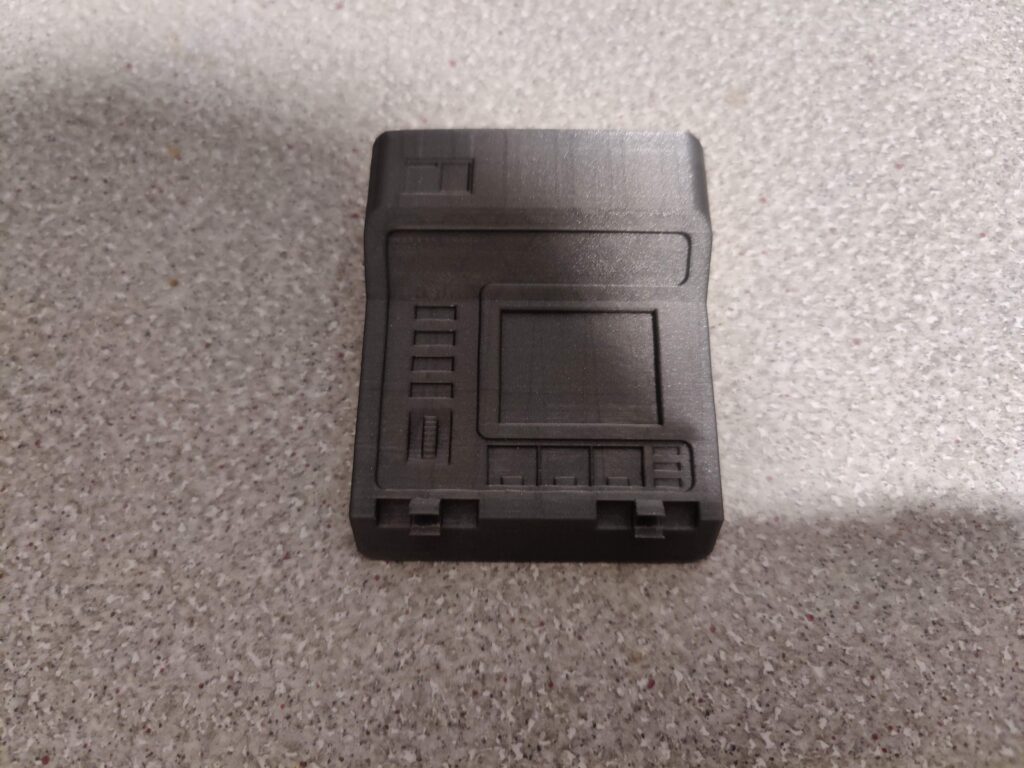
In the past I have wanted and been unable to find a good enough Tricorder, only ever finding a small one that didn’t really work for cosplay purposes. Once again my 3D printer offered a solution, though the tricorder model was pretty much the largest thing my small printer could manage. This is the model I chose to print, as it was broken down into small enough components.
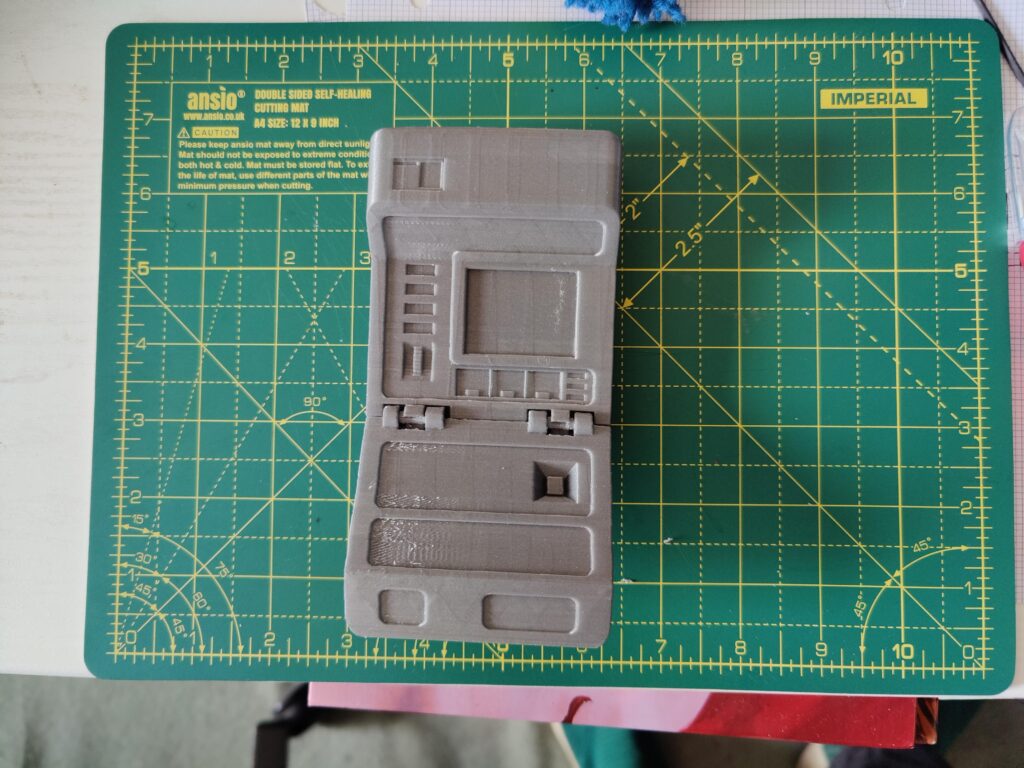
Printing…PrintedWith flip attached
The print overall took several hours over several days. Fortunately I was still working from home so could supervise the printer over longer prints. Alas I didn’t have time to paint it before LFCC, so had to go with it unpainted as a prop.
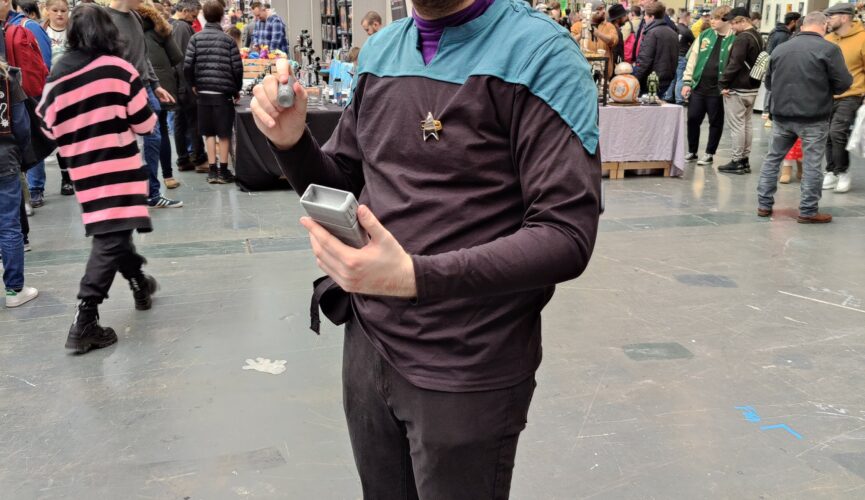
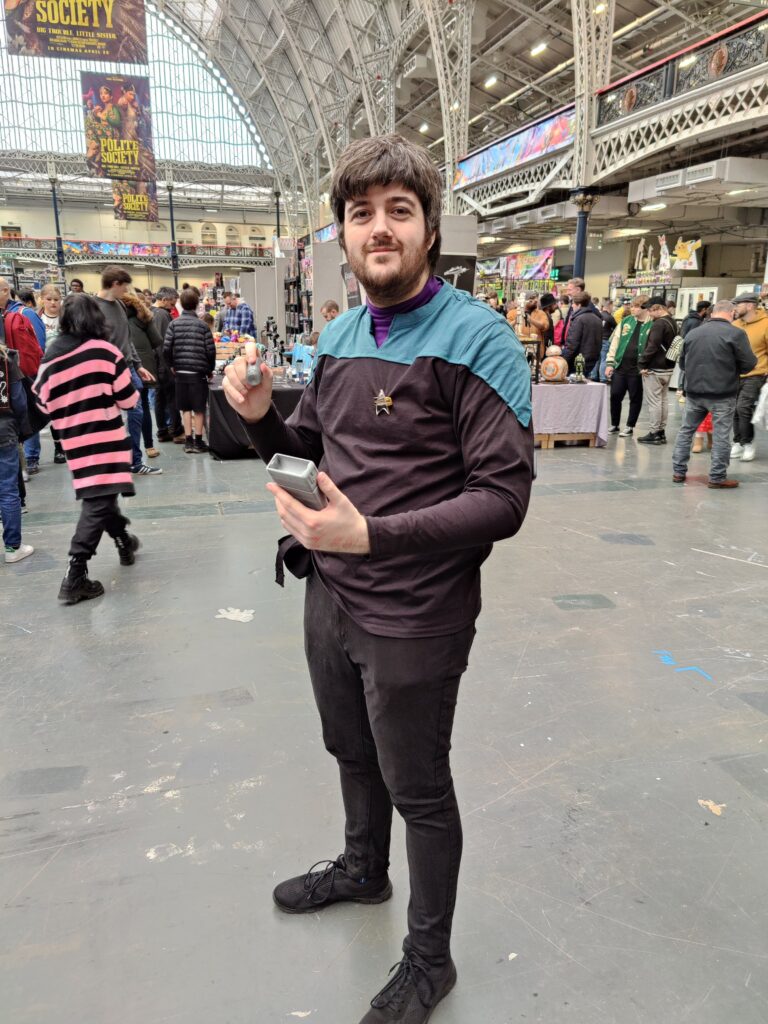
EMH beaming down to Kensington
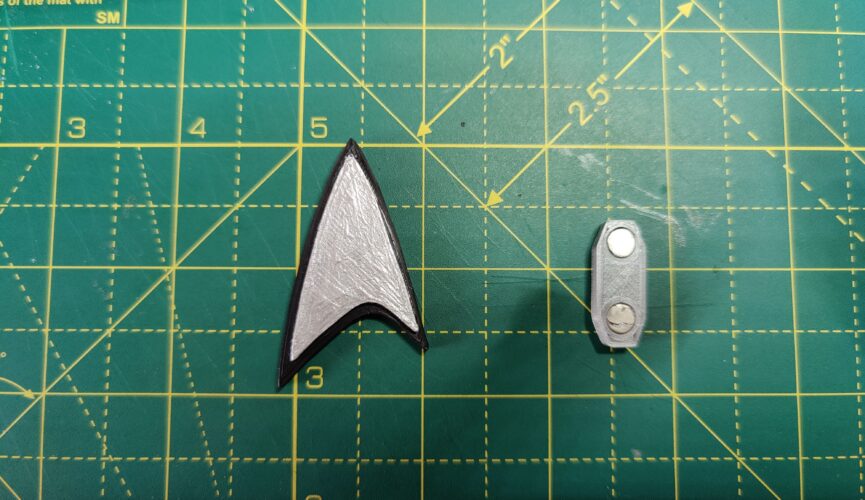
I found the metal pin badge a bit heavy and dragging on the uniform, so I decided one of the refinements would be to print a lighter magnetic voyager combadge, and I also intended to find or make a 3D printed hypospray to go with the tricorder (after I had painted it).
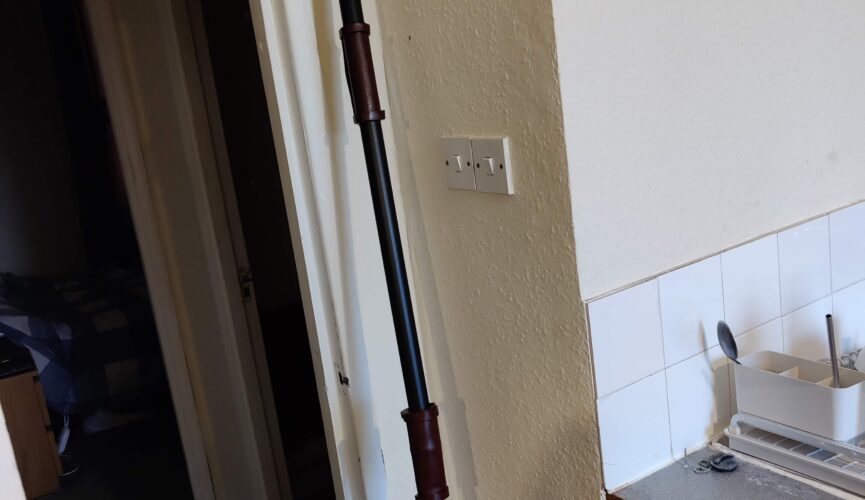
The first (and arguably less important) task for the Portal 63 cosplay was obtaining a spear of the right design. I also had the additional requirement, beyond the spear being foam (or similar soft material) that it would have to be collapsible. This was both to make transporting the spear easier, but also because I would be wearing the costume throughout the day, including when attending panels and stage events. Having learned from previous years about being considerate towards those sat behind me, I would need to be able to partially disassemble the spear when sat down.
The best solution by far, given the collapsible requirement and the specific design, was to make the spear myself. This would count as the “new skill” for this costume as I’ve never tried to make a cosplay weapon prop before, let alone one as long as a spear. Fortunately a good friend of mine had some advice, and I have an ample supply of those most useful materials: 3mm foam and hot glue.
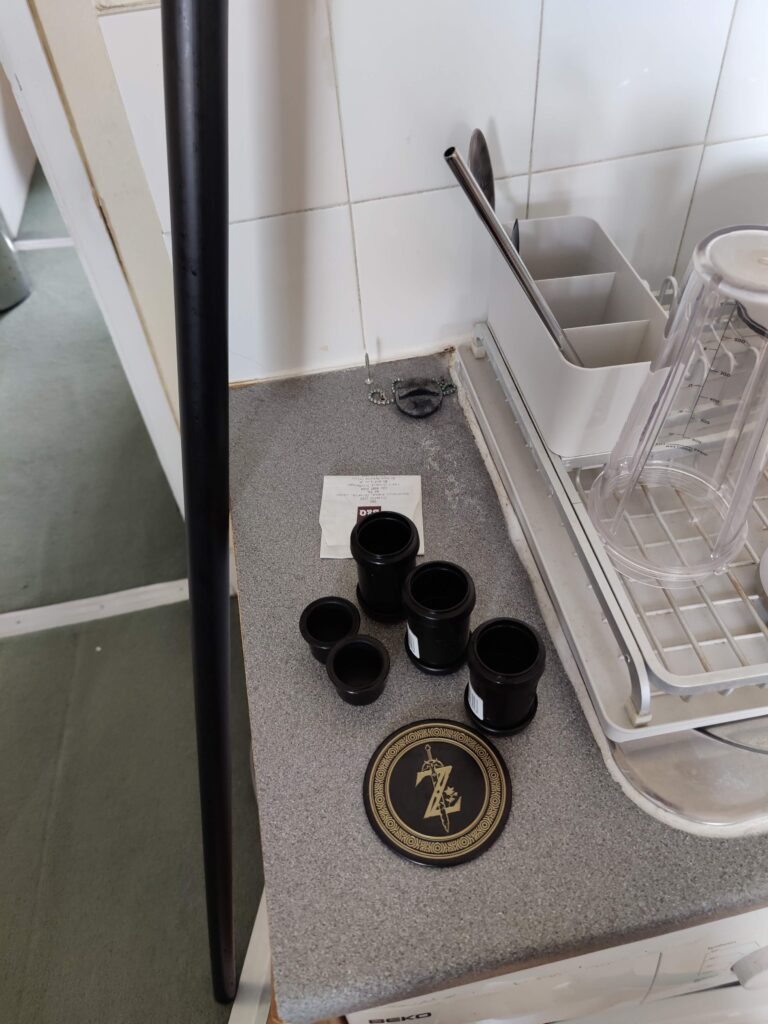
For the shaft of the spear I ventured to a (not very) local hardware store to acquire a 2m length of black plastic piping, along with three push-fit connectors and two end caps. I went for the 32mm diameter because I wanted the added thickness to hopefully make the final product more solid. The spear head isn’t a very wide design, so I figured there wouldn’t be too much of a torque on the joints to require more permanent securing methods.
Pipe, pre-cut, and joiners.
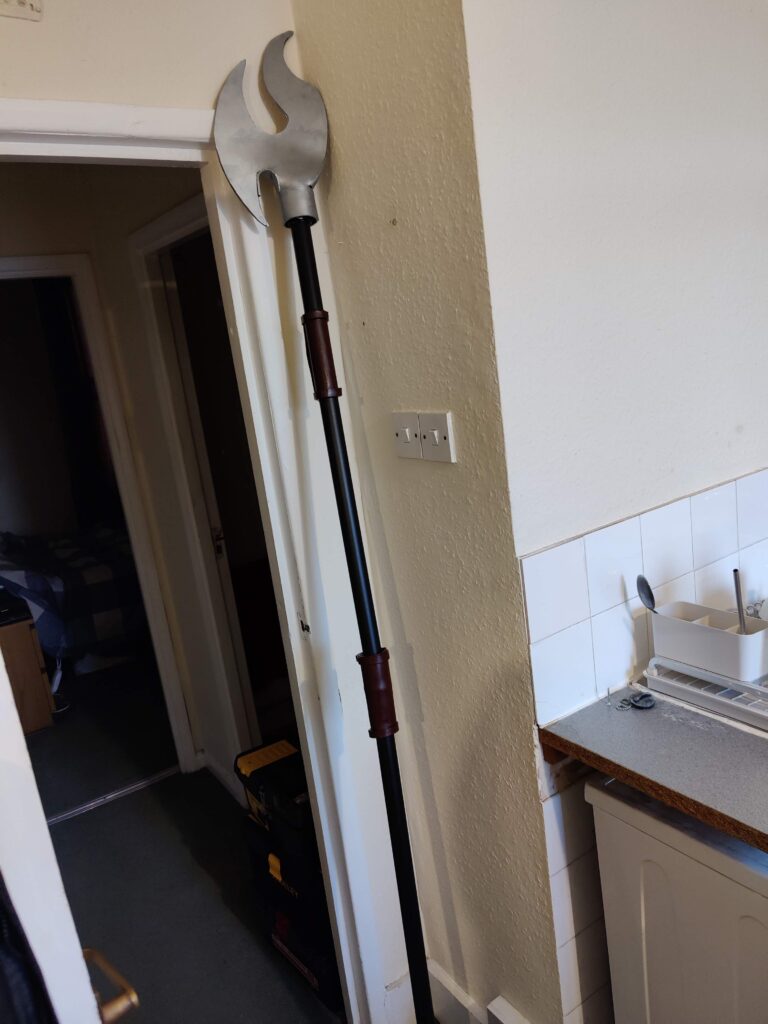
I bought a pipe cutter to cut the pipe in half, and reduce the overall length as necessary. Then I glued the joiner sections with hot glue, one to each end of the lower pipe. The upper joiner would be the base of the spearhead, which I wanted to be detachable for portability reasons. I drew a cardboard template for the spearhead, and used that to cut out sections of 3mm foam to make the head and handle sections. A lot of hot gluing later:
Spear made with foam additions, pre-painting
Painting the parts was relatively straightforward, using a base coat of black and top coats of brown/silver acrylic paint.
The first planned costume for Destination Trek 2023, Friday 18th, was Boimler from Lower Decks. As this was intended to be a lower effort mostly-bought costume, there isn’t a lot to really say beyond sourcing and ordering the uniform and coloured hair wax. However there were a couple of parts which I did make.
Magnetic Starfleet Rank Pips Set
These were not made specifically for the Boimler cosplay, I had the idea to create a set of magnetic rank pips after my experience with some pin-badge style ones I had bought for previous conventions. By far the biggest issue, especially when applying them myself, was getting the spacing and alignment right. Any rank beyond lieutenant was basically impossible, so with a 3D printer I figured I could design a magnetic strip and a set of pips that would make aligning them a lot easier.
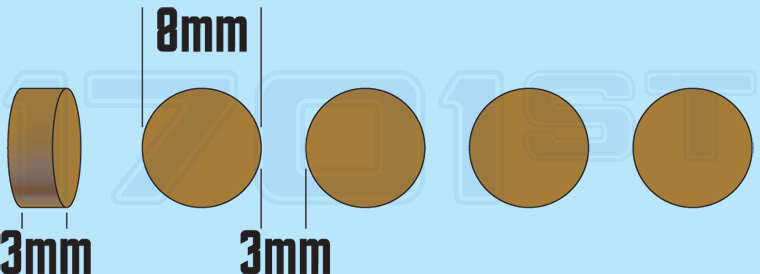
First I had to find a source for the size and dimensions of Starfleet rank pips, as well as their spacing. Fortunately a google image search yielded this:
Pip dimensions
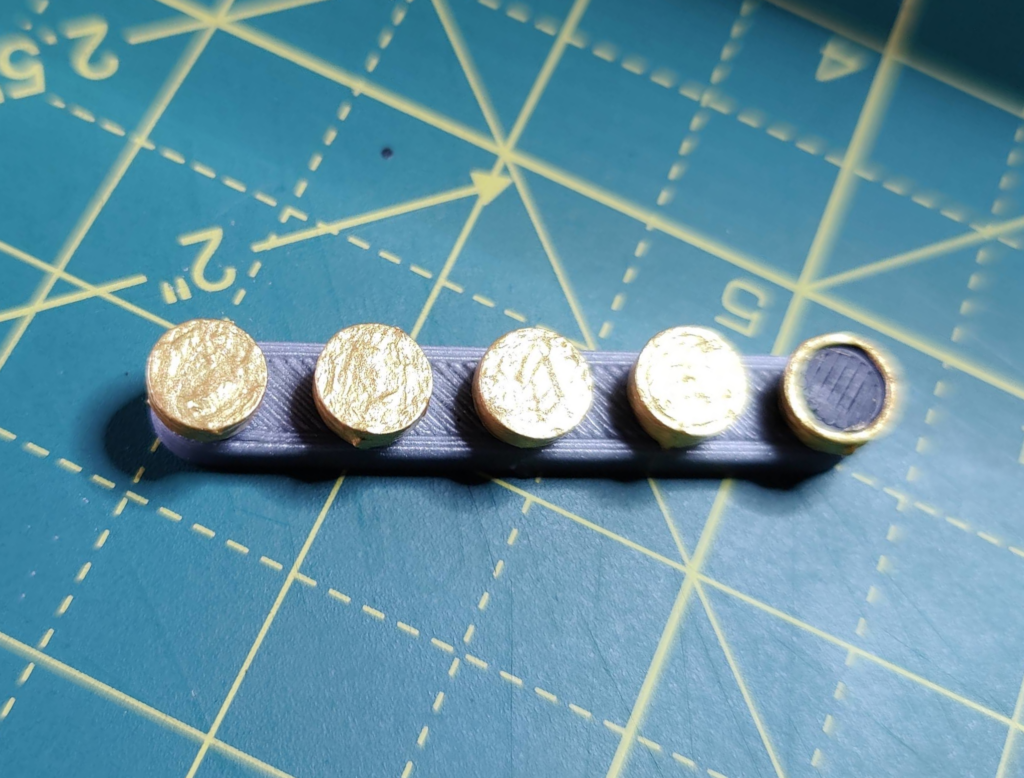
This would make the design very straightforward, as simple shapes like cylinders are very easy to create and combine in Blender. One concern I had was the magnets I intended to use might have been strong enough so close to each other to make gluing them difficult, but it turned out this wasn’t an issue. The intent was to create a strip of five magnets, four “full” pips and one “junior” pip. This would allow any rank from ensign to captain possible, including lieutenant junior grade and lieutenant commander.
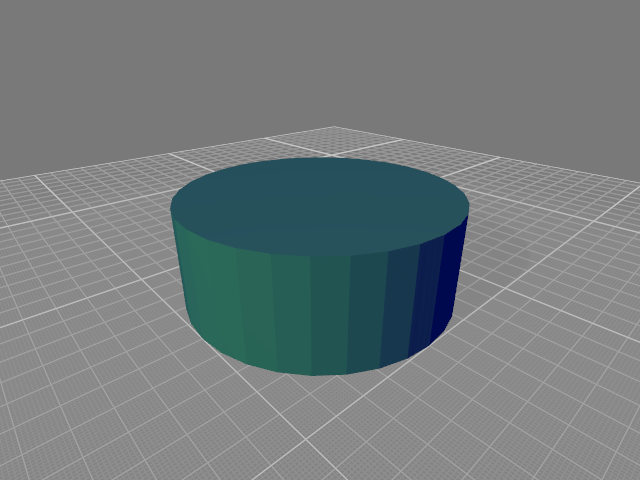
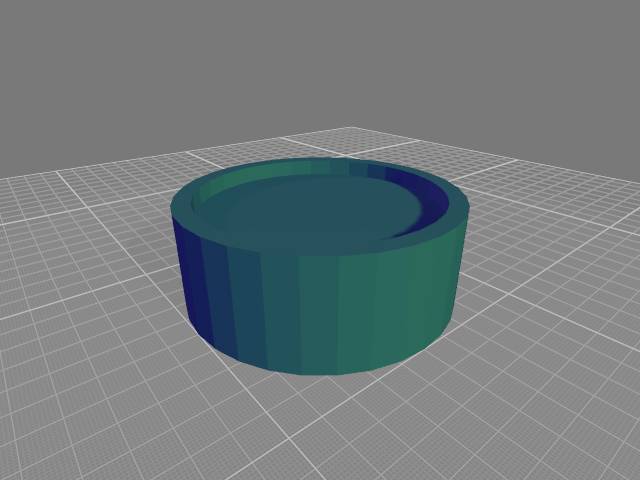
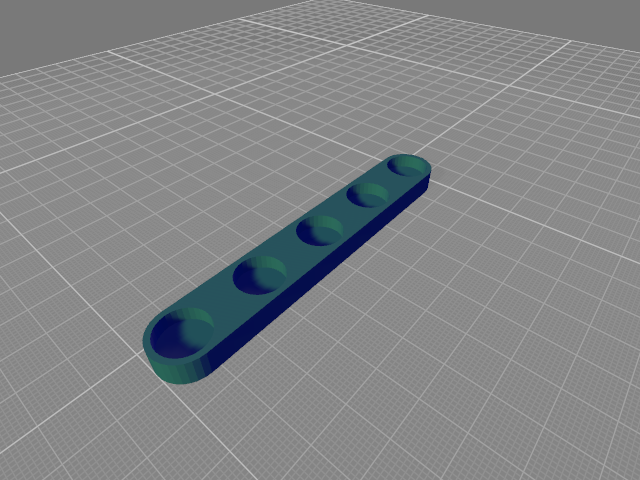
Full PipJunior PipMounting Strip
Printing the strip was relatively straightforward, but I had to print the pips twice. The first print had support structures which were very difficult to remove, and with the pips being only 8mm across I tried printing without supports. There was some material drooping, but not too much that I couldn’t remove it. I then used superglue to attach the magnets one at a time (to avoid the attraction between magnets dislodging them before the glue set.) Then they just needed painting, a base coat of black and overcoat of gold.
Printed, magnetised and painted.
If you want to print a set of these pips yourself, I uploaded the STL files to Thingiverse.
Lower Decks Combadge
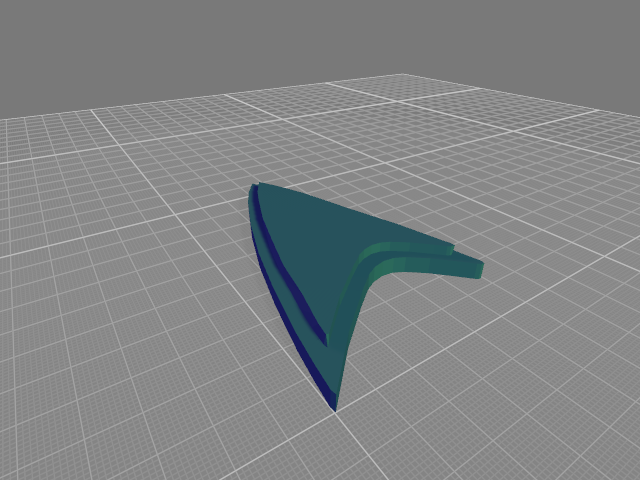
Modelling the Lower-Decks style combadge involved importing a 2D image of the communicator into blender to use as a template for creating a 3D version:
Combadge Image
3D Model
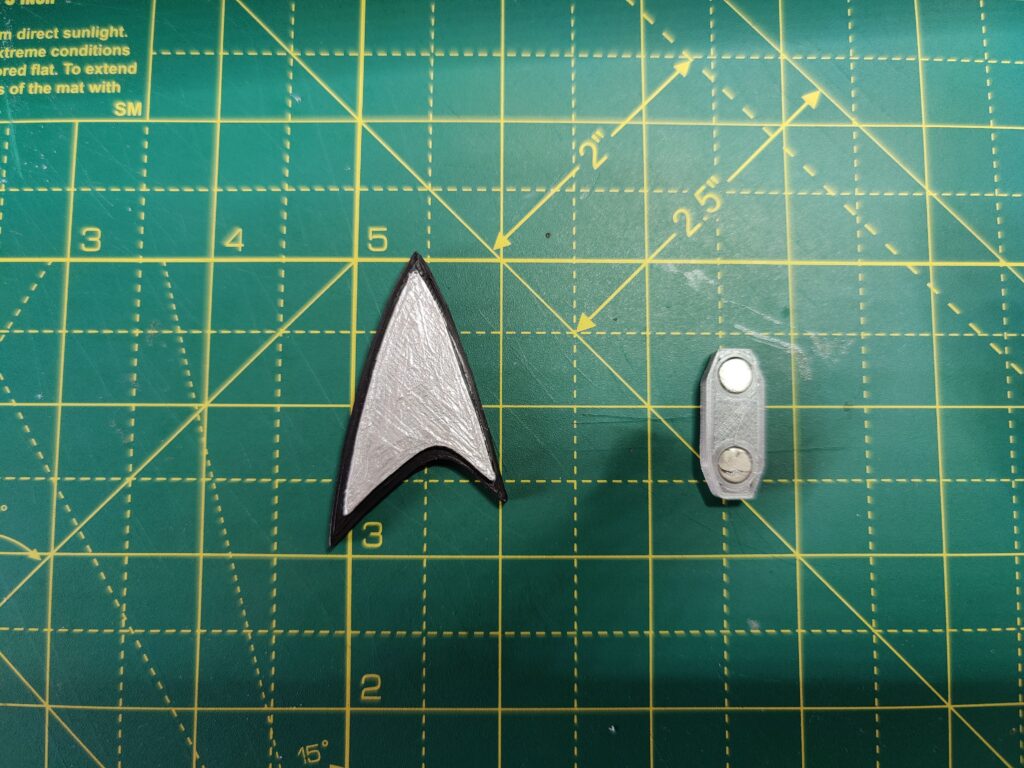
I also designed and printed a magnetic clip to hold the Combadge to a uniform. Printing and painting took a few hours.
Combadge printed and painted, along with magnetic clip
If you want to print your own Lower Decks style combadge, I also uploaded the STLs to Thingiverse.
As Destination Trek 2023 gets underway, it is time to look back to the last Destination event in 2021. Despite the disappointment of cancelled guests it was one of my best conventions, and by far the best reception I received for a single costume.
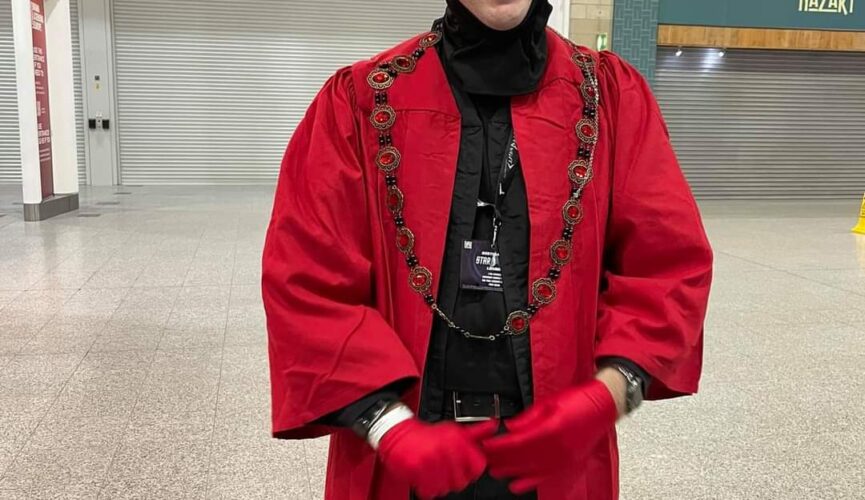
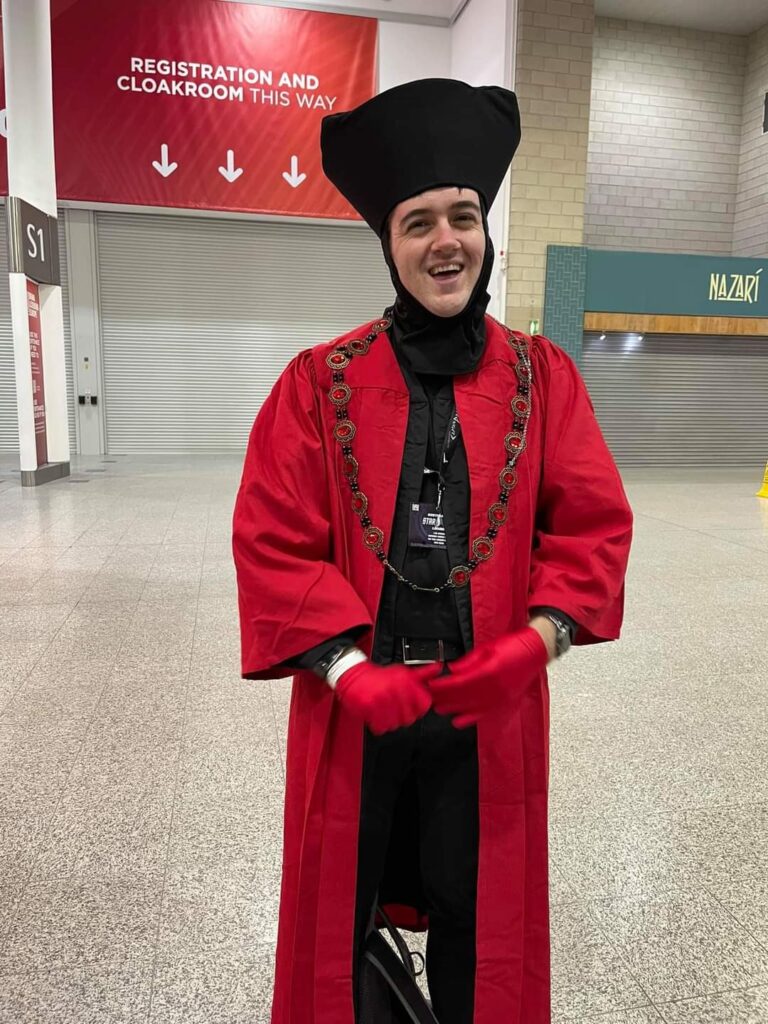
Believe it or not this was actually the second incarnation of the Q costume. The first was created for a Star Wars vs Star Trek party hosted by one of my meetup groups. Obviously I had to represent Star Trek in this pending conflict, and what better champion for Trek than arguably the most powerful entity? Among Q’s many guises, only one I could think of really said “Q” unambiguously: The Judge Q from Encounter at Farpoint and All Good Things.
The costume itself was actually not difficult to put together. Black and red choir robes, red gloves, a livery collar and black head sock were readily available to order from Amazon. The only piece I could not find was the hat, which suited me as I like to make at least one piece of each costume.
The hat involved finding screenshots of Q and using pixel measurements to estimate the dimensions. I measured my own head to scale the resulting design, then made it using black fabric and 3mm foam. I made it using a truncated cone of foam hot glued together, sewn inside the same shape made from black cotton fabric. The first version of the hat was actually a bit too tight and the fabric didn’t quite sit on the foam correctly.
I wore the costume for the party, which went down well, and then some time later I decided to throw the costume out. I have limited space in my flat and I had more costume ideas to work on, so it was sadly time to let the Q costume go.
Roll the clock forward a few months and I get asked if I could use the costume for a planned Star Trek LARP game. Alas I no longer had the costume, but I figured I could make it again without too much trouble. Plus I would have a chance to improve on the hat. Alas the pandemic struck in 2020 and the LARP game got postponed, so the costume sat unworn in my flat awaiting its calling.
When I decided to attend Destination Star Trek 2021 I figured I already had the costume, so why not wear it? I’m glad I did, it was something of a hit on the Saturday. I don’t think I’ve ever been in so many photos!
August 2023 is the Destination Trek convention, and three days of Star Trek means three days of cosplays! My last outing to Destination Star Trek 2021 in London was incredibly successful with my Q cosplay, and in all honesty I don’t expect to replicate the sheer volume of positive feedback and photo requests I got back then.
But I try not to dwell in the past, even a successful cosplay has its time and then I have to move on to something new. Because there are three cosplay opportunities I tend to try and focus my efforts on a “main” cosplay for the convention, with other cosplays either being low-effort buy-and-wear affairs or an economical use of efforts for preceding conventions (like LFCC or MCM) that I can then re-use (or improve on) for Destination Trek.
This year my three project plans are:
Ensign Boimler from Lower Decks – This will be my lower-effort affair, and part of a possible group cosplay. This will involve buying and combining elements rather than making anything from scratch.
Portal 63 from Next Generation Episode “The Last Outpost” – This will be the main project, making basically everything from scratch.
Emergency Medical Hologram from Voyager – This is my re-use project, which I originally made for LFCC Spring 2023 (with the intent to re-use it) however I have some plans to add to it prior to August.
Today we go back to 2018, over five years ago now. Whilst most of my cosplay efforts are put to conventions, a few are reserved for the occasional private party. One such occasion was the 2018 Star Wars party, held sort-of annually (at the time) at one of the meetup groups of which I am a member. A notable part of the celebration was, of course, a costume competition, and among a few rival cosplayers I was determined to win.
What more iconic a character to go for than Darth Vader, a tall and imposing figure. The helmet I knew would be beyond my ability to make myself, as would a suitable lightsabre, so those components I would purchase. As for the rest, I would manufacture the pieces entirely from scratch or find and buy online. The goal is never to buy an entire costume (as in searching and buying a “Darth Vader” costume) but finding disparate pieces (like a set of black gloves, a sweatshirt with a suitable weave pattern, a black cloak) to combine together is as much a part of the cosplay process as making something entirely from scratch. (Not to say that buying and wearing a complete costume is in some way “less valid”, some people enjoy the wearing more than the making and that’s fine. I just personally always enjoyed the challenge of making a costume as much as wearing one).
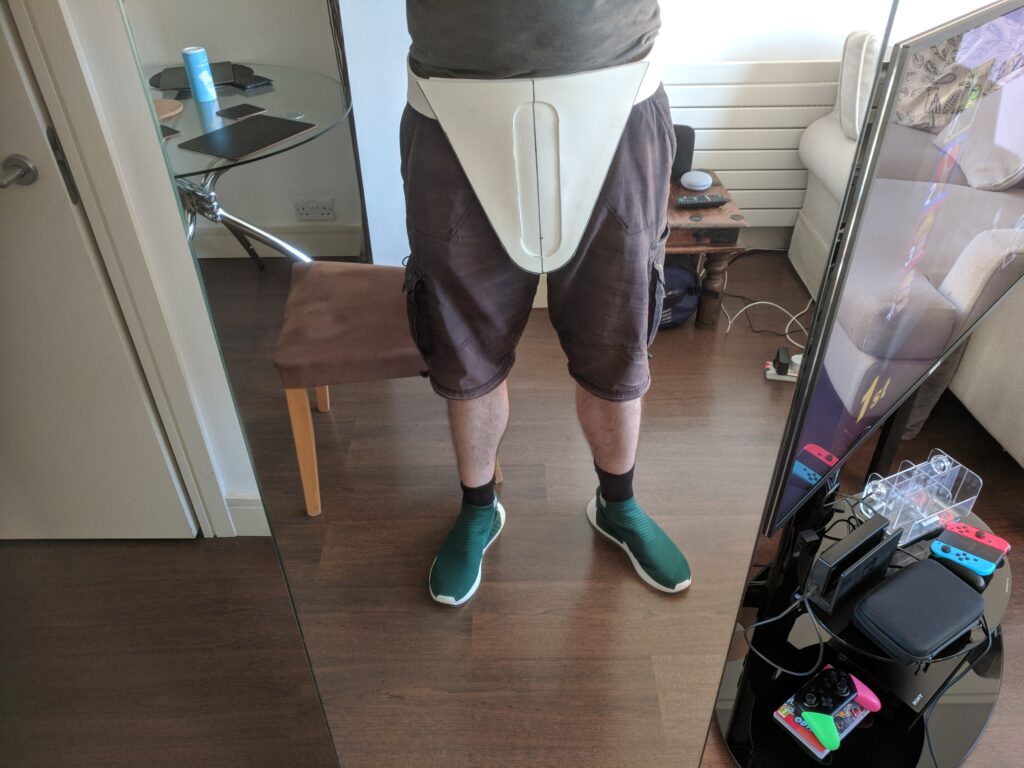
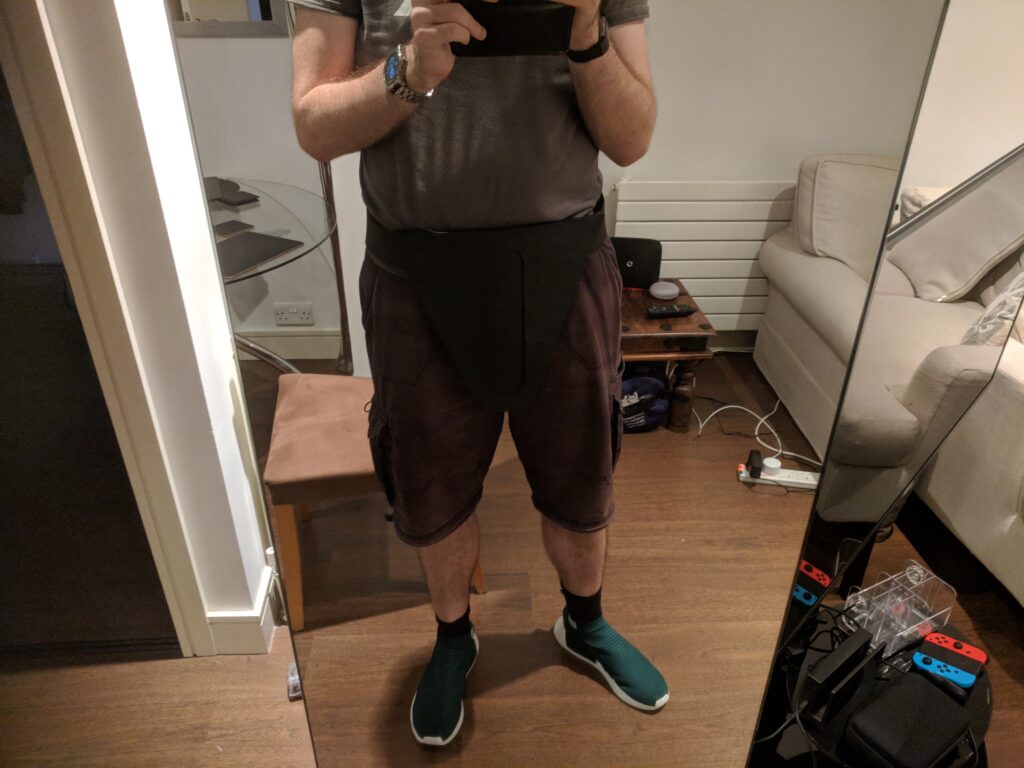
Anyway, on the list of things to make were the switch boxes, belt buckle, shoulder armour and the armour around the waist.
Switch Boxes
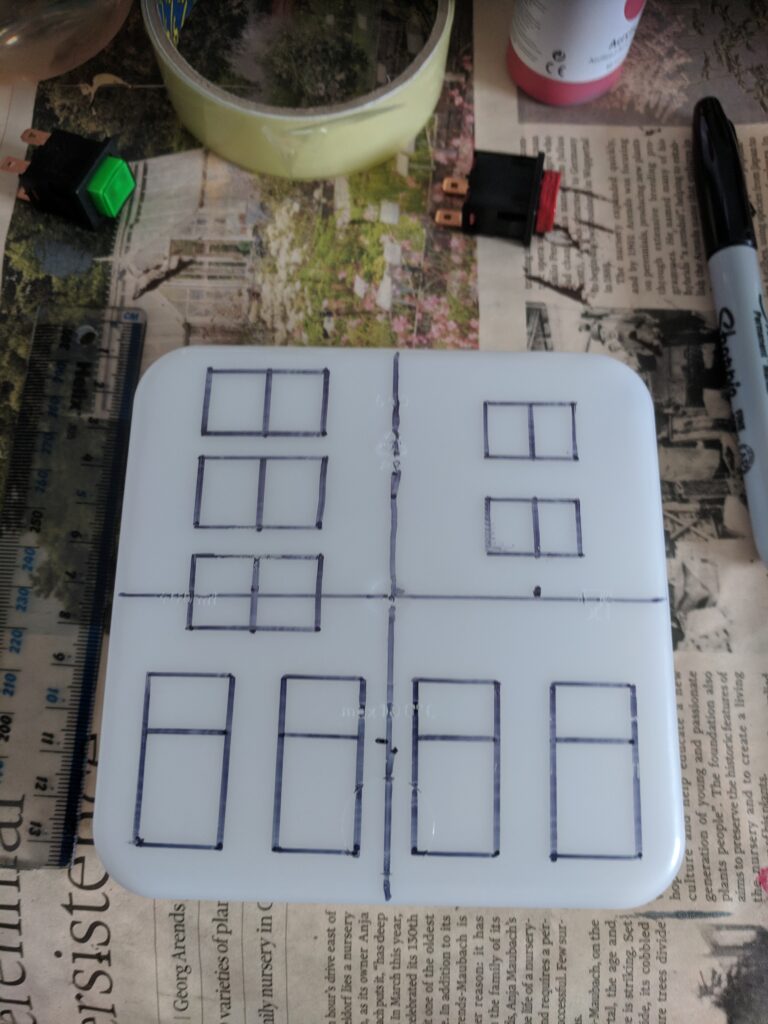
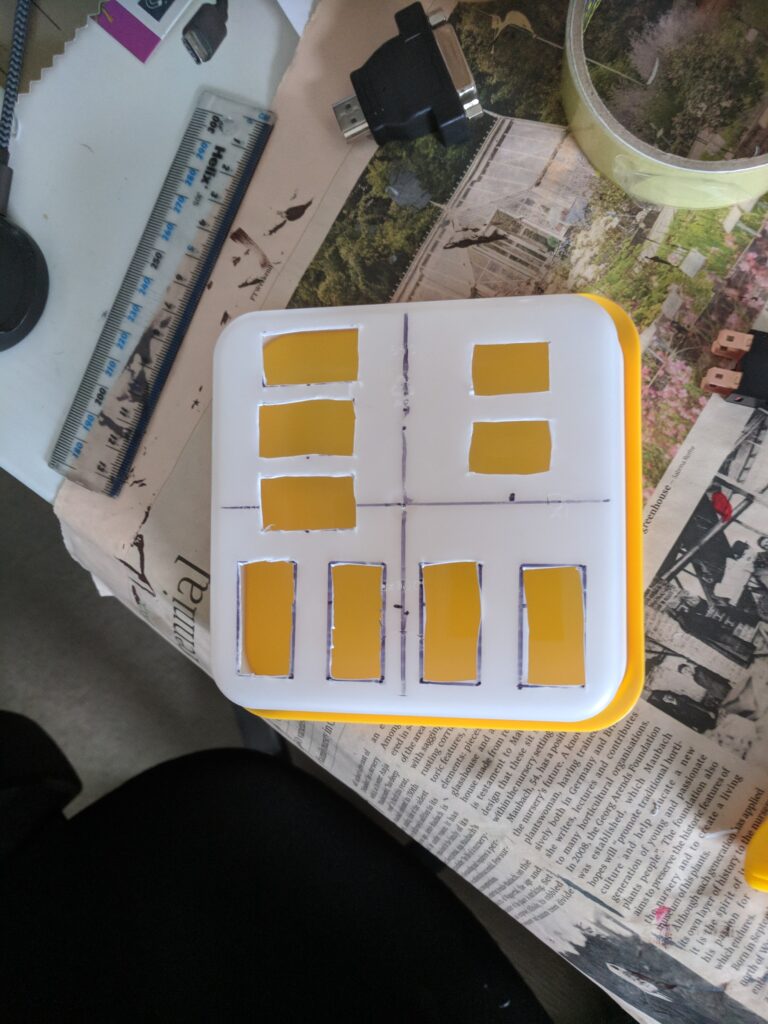
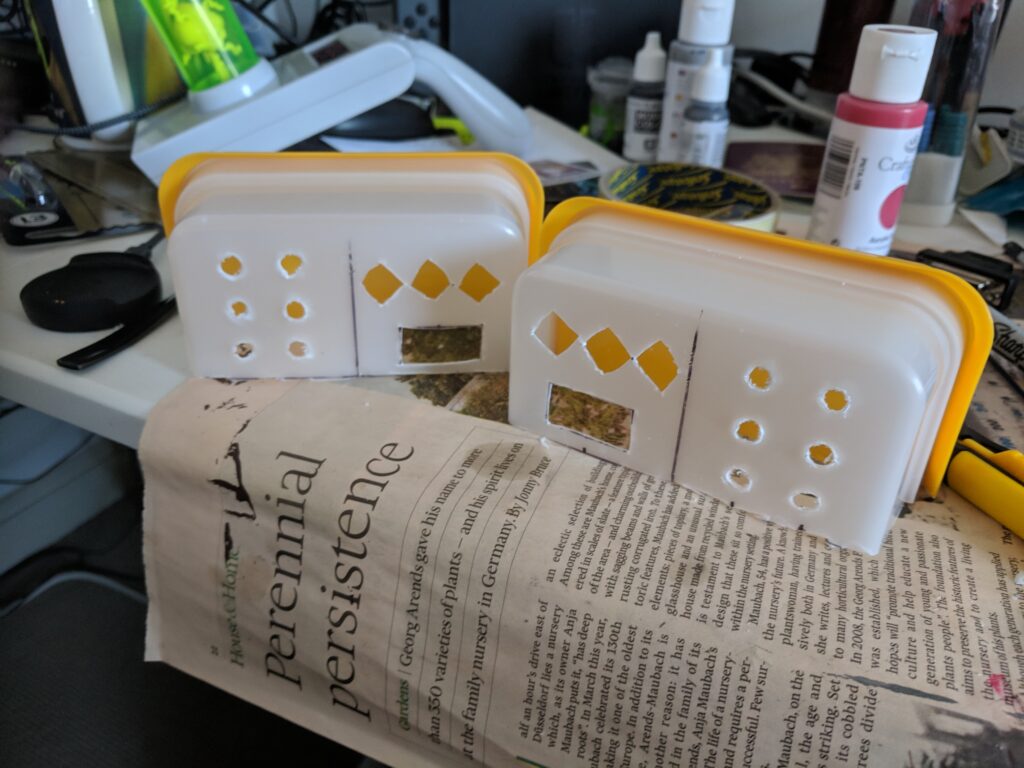
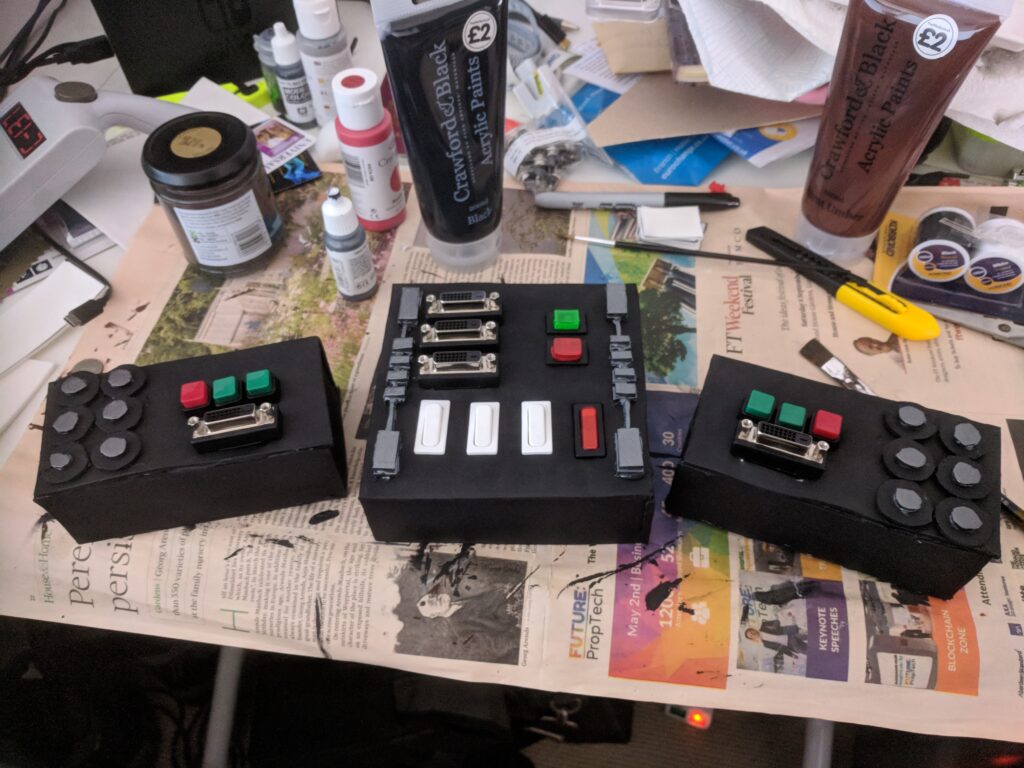
I purchased a bunch of random electrical components; including rocker switches and push-button switches, as well as a few DVI-to-HDMI adapters for the “data ports”. I bought a couple of square cheap plastic tupperwares which would be the base of the boxes, and around which I would glue some trusty 3mm foam.
Tupperware with cutouts markedTupperware with cut outsWaist-mounted box to be cut in halfWaist-mounted boxes cut
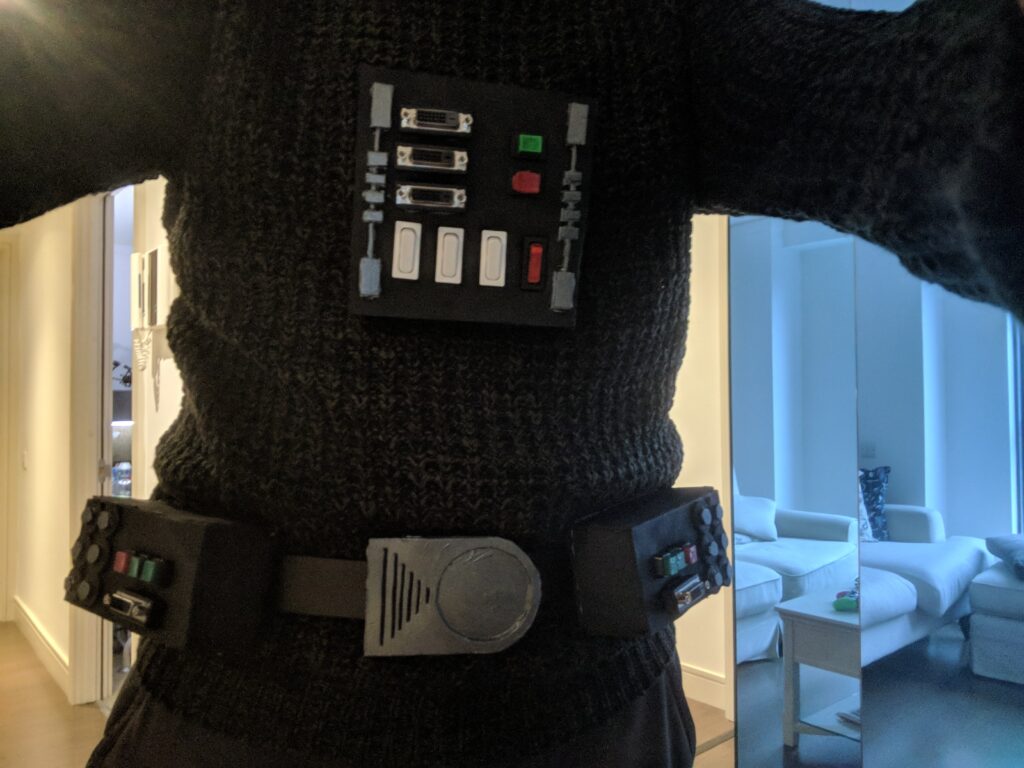
The plan was to adhere the chest box to a top using velcro strips and add slots onto the waist boxes to thread a belt through. Whilst the velcro worked, it’s worth noting that sticky-back velcro can often adhere more strongly to the other velcro strip than to the adhesive. And do not try to sew sticky back velcro. The adhesive will make a difficult hand-sewing job harder and will ruin your needle. Not long after this project I found some non-sticky-back velcro to use for future sewing projects.
Boxes encased in 3mm foam and paintedTesting the attachment
For the components I couldn’t find I made mock-ups with 3mm foam. The belt-buckle was two layers of 3mm foam hot-glued together and painted, with an additional layer of foam loops behind. I found a black wooly jumper similar in appearance to the vertical threads Vader seems to wear, so this formed the base of the top half of the costume.
Shoulder and Waist Armour
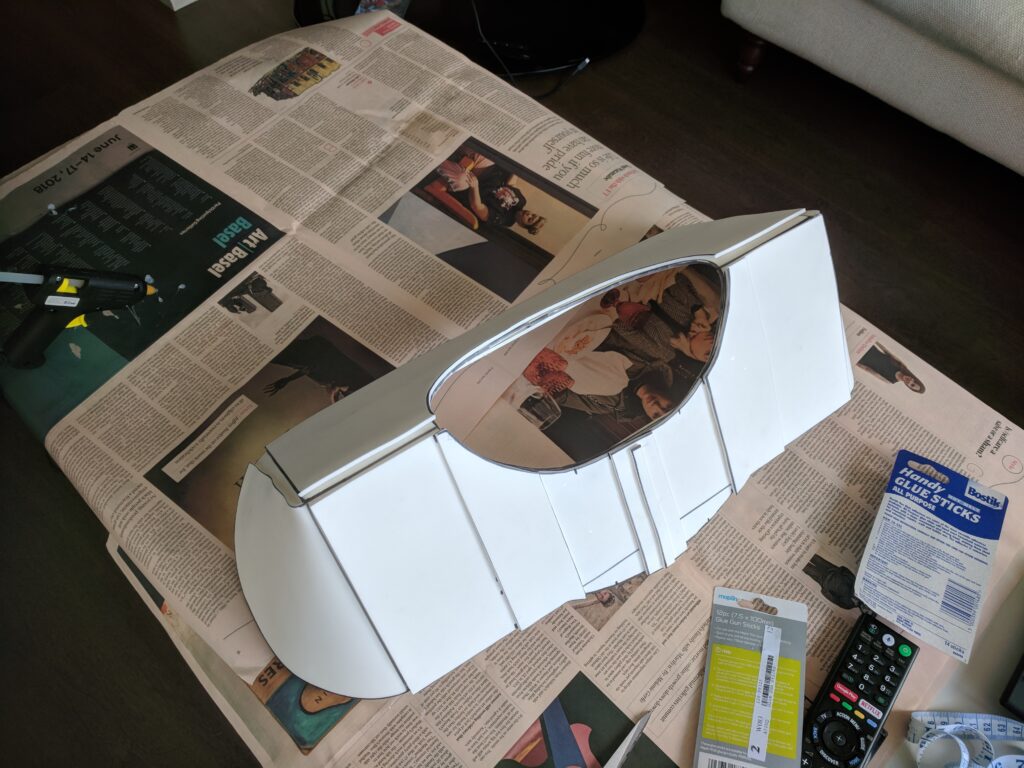
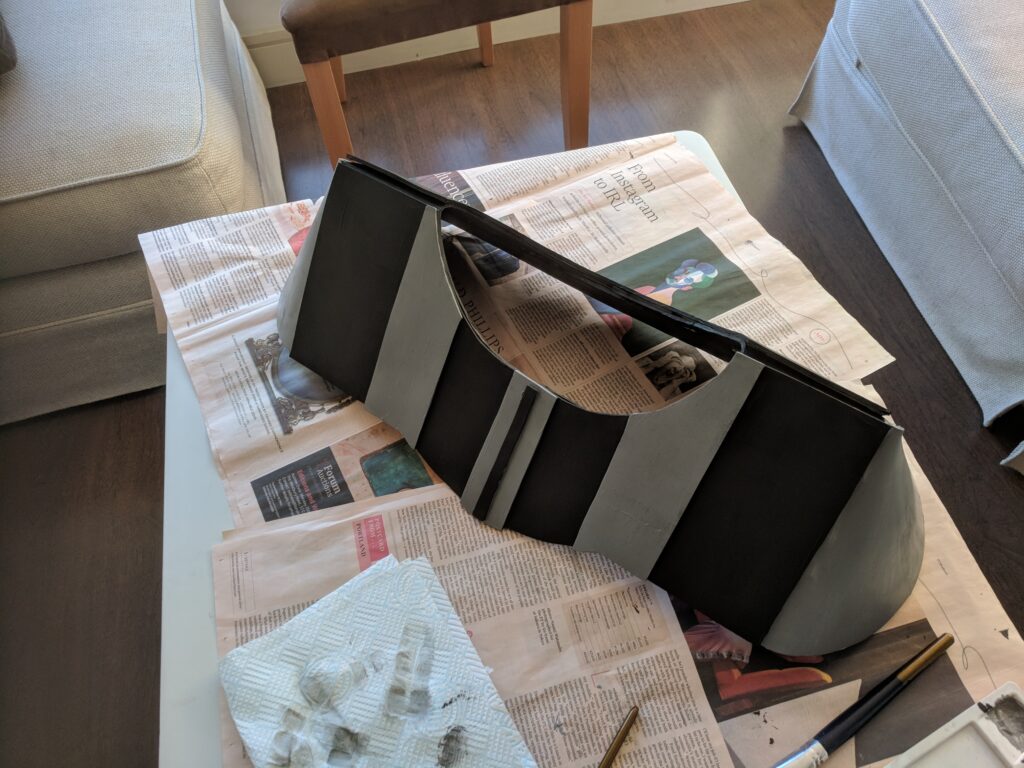
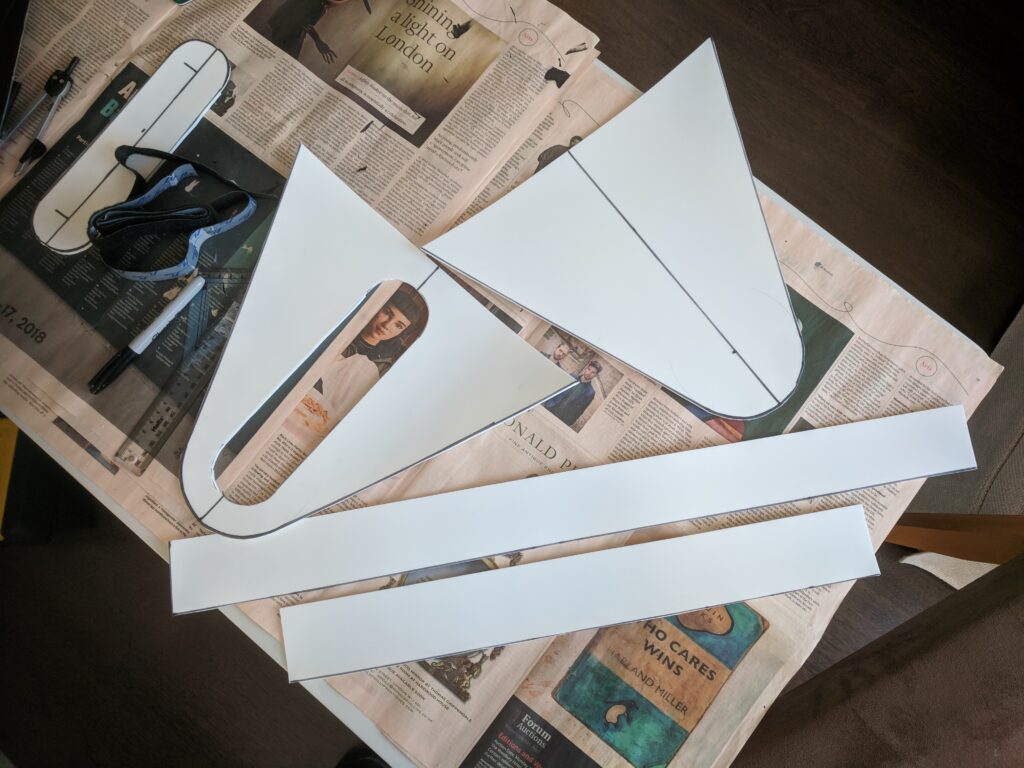
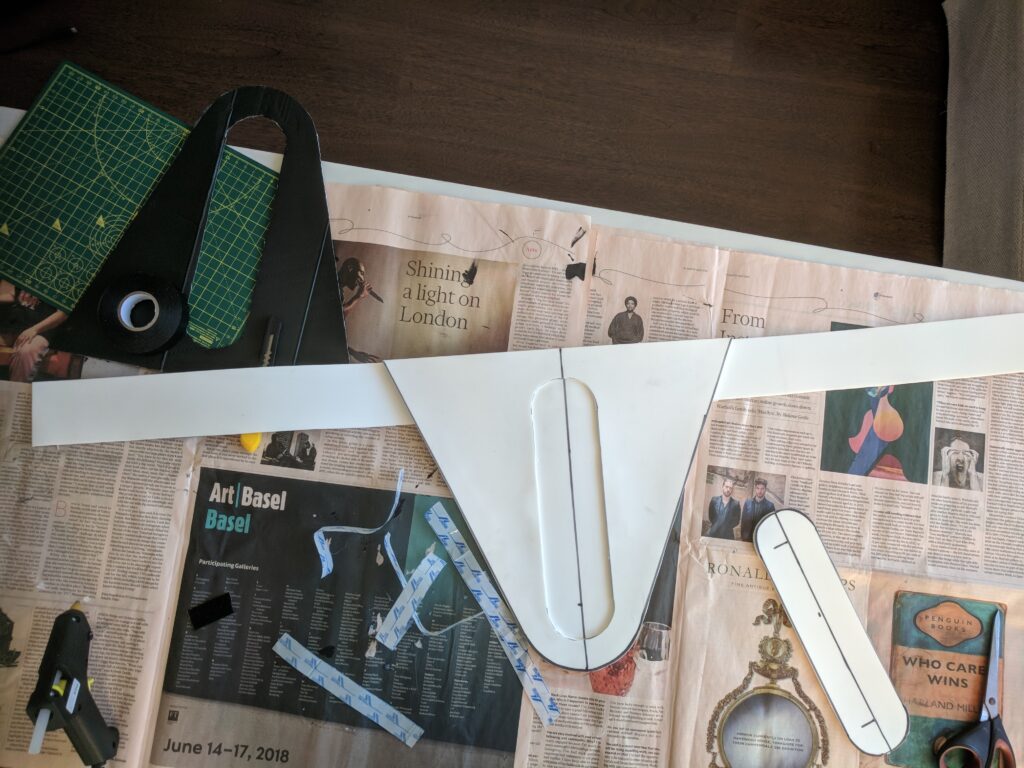
To create these I once again turned to our old friends, 3mm foam and hot glue. This essentially involved figuring out a rough 2D net for the sort of 3D basic shape I wanted to go for, then making and folding that shape together from the foam.
Shoulder armour gluedShoulder armour painted
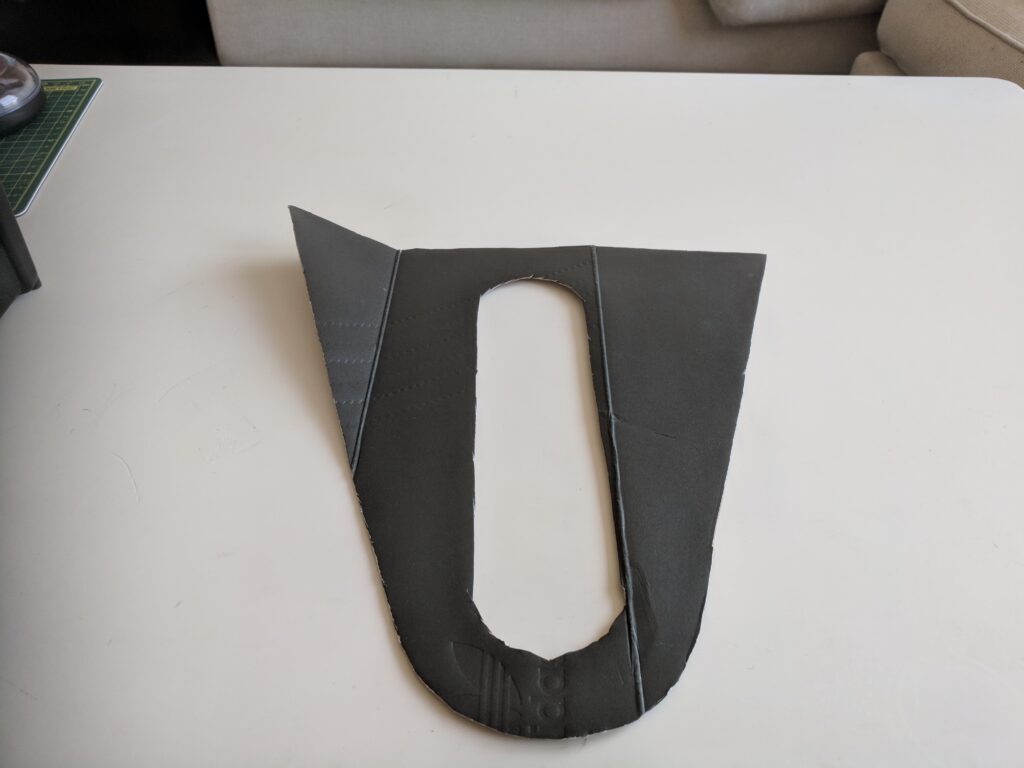
The waist armour was a simpler 2D shape with a “belt” section to wrap around the back.
Cardboard templateFoam components prior to gluingGlued togetherFit check
Painting the last piece of armour black was the last step, then it was a matter of combining everything with the trousers, gloves, cloak, helmet and lightsabre.
Waist armour painted
I would learn that the foam waist armour would make it awkward to sit down in the costume, so when I later decided to wear the Vader costume for that year’s Nine Worlds con, I remade this component out of black fabric for better comfort.
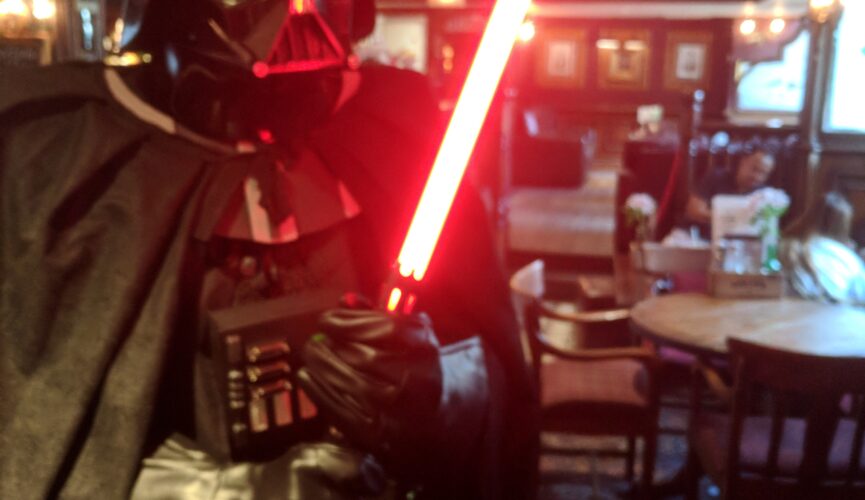
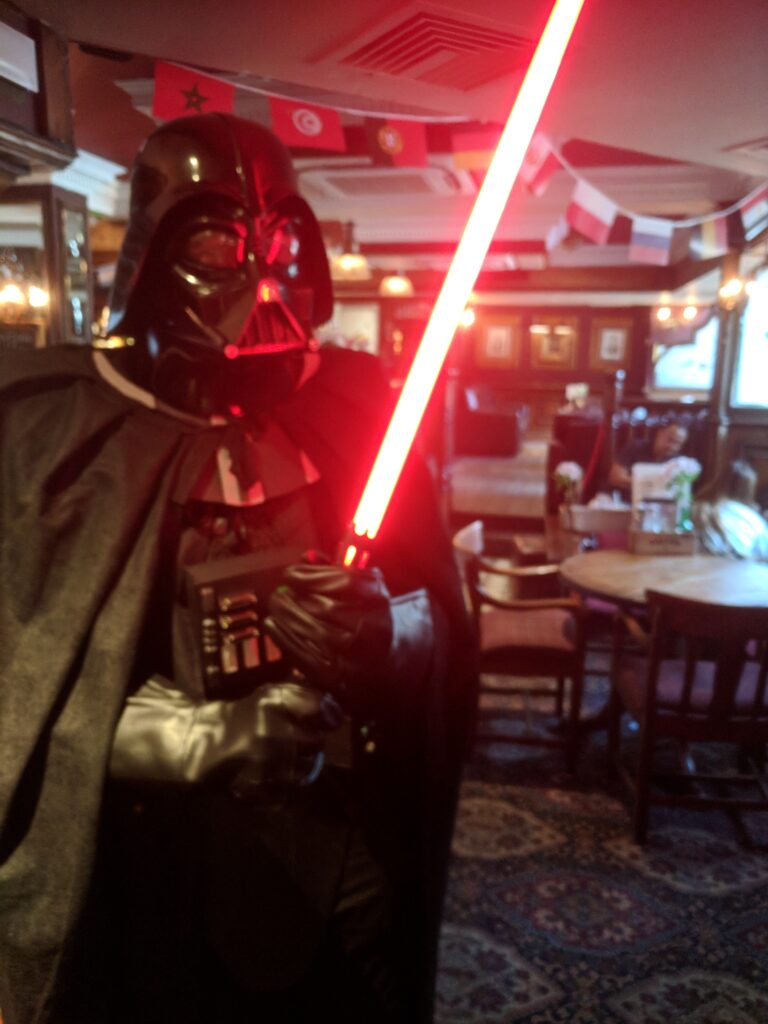
I find your lack of focus disturbing
Unfortunately when it came time for my friend to snap a few pictures at the party the lightsabre caused some issues with my phones autofocus, so none of the pictures were particularly clear. This was the best one. Still, the costume was a success, won me the competition, and was also fun to wear at Nine Worlds. (I particularly remember a photo op with a bunch of Cathay Pacific flight attendants who were staying in the same hotel which was quite amusing)
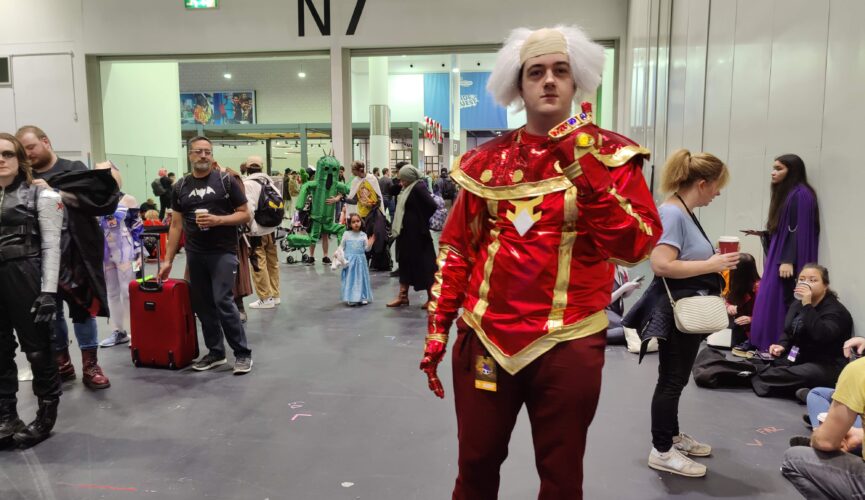
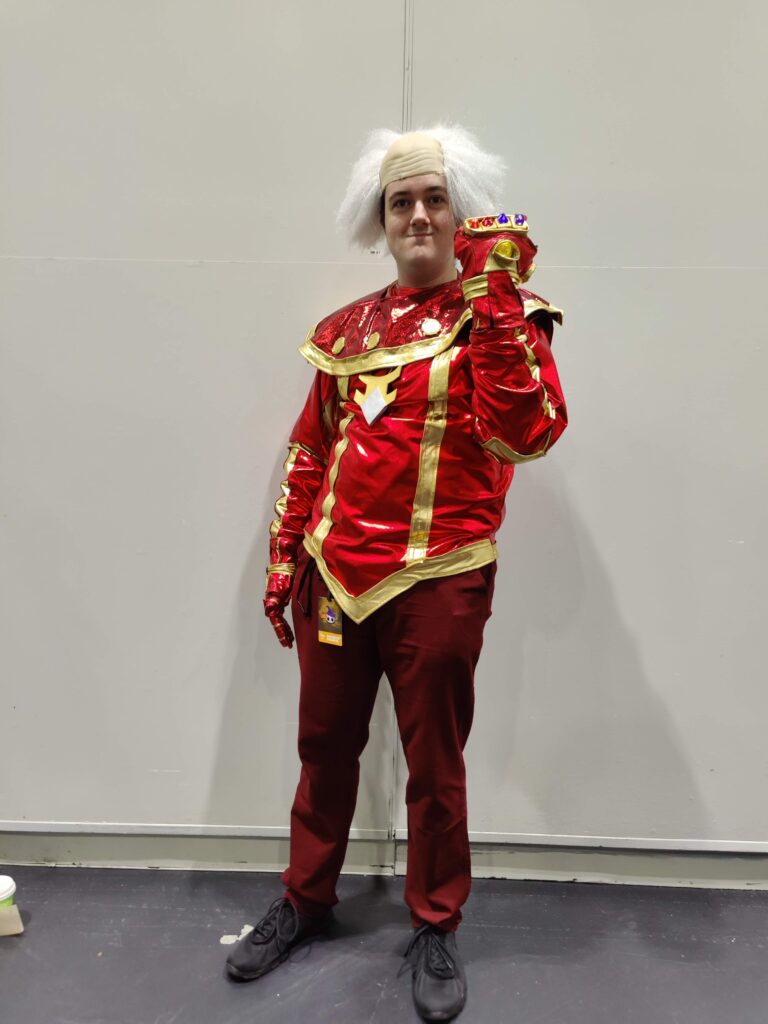
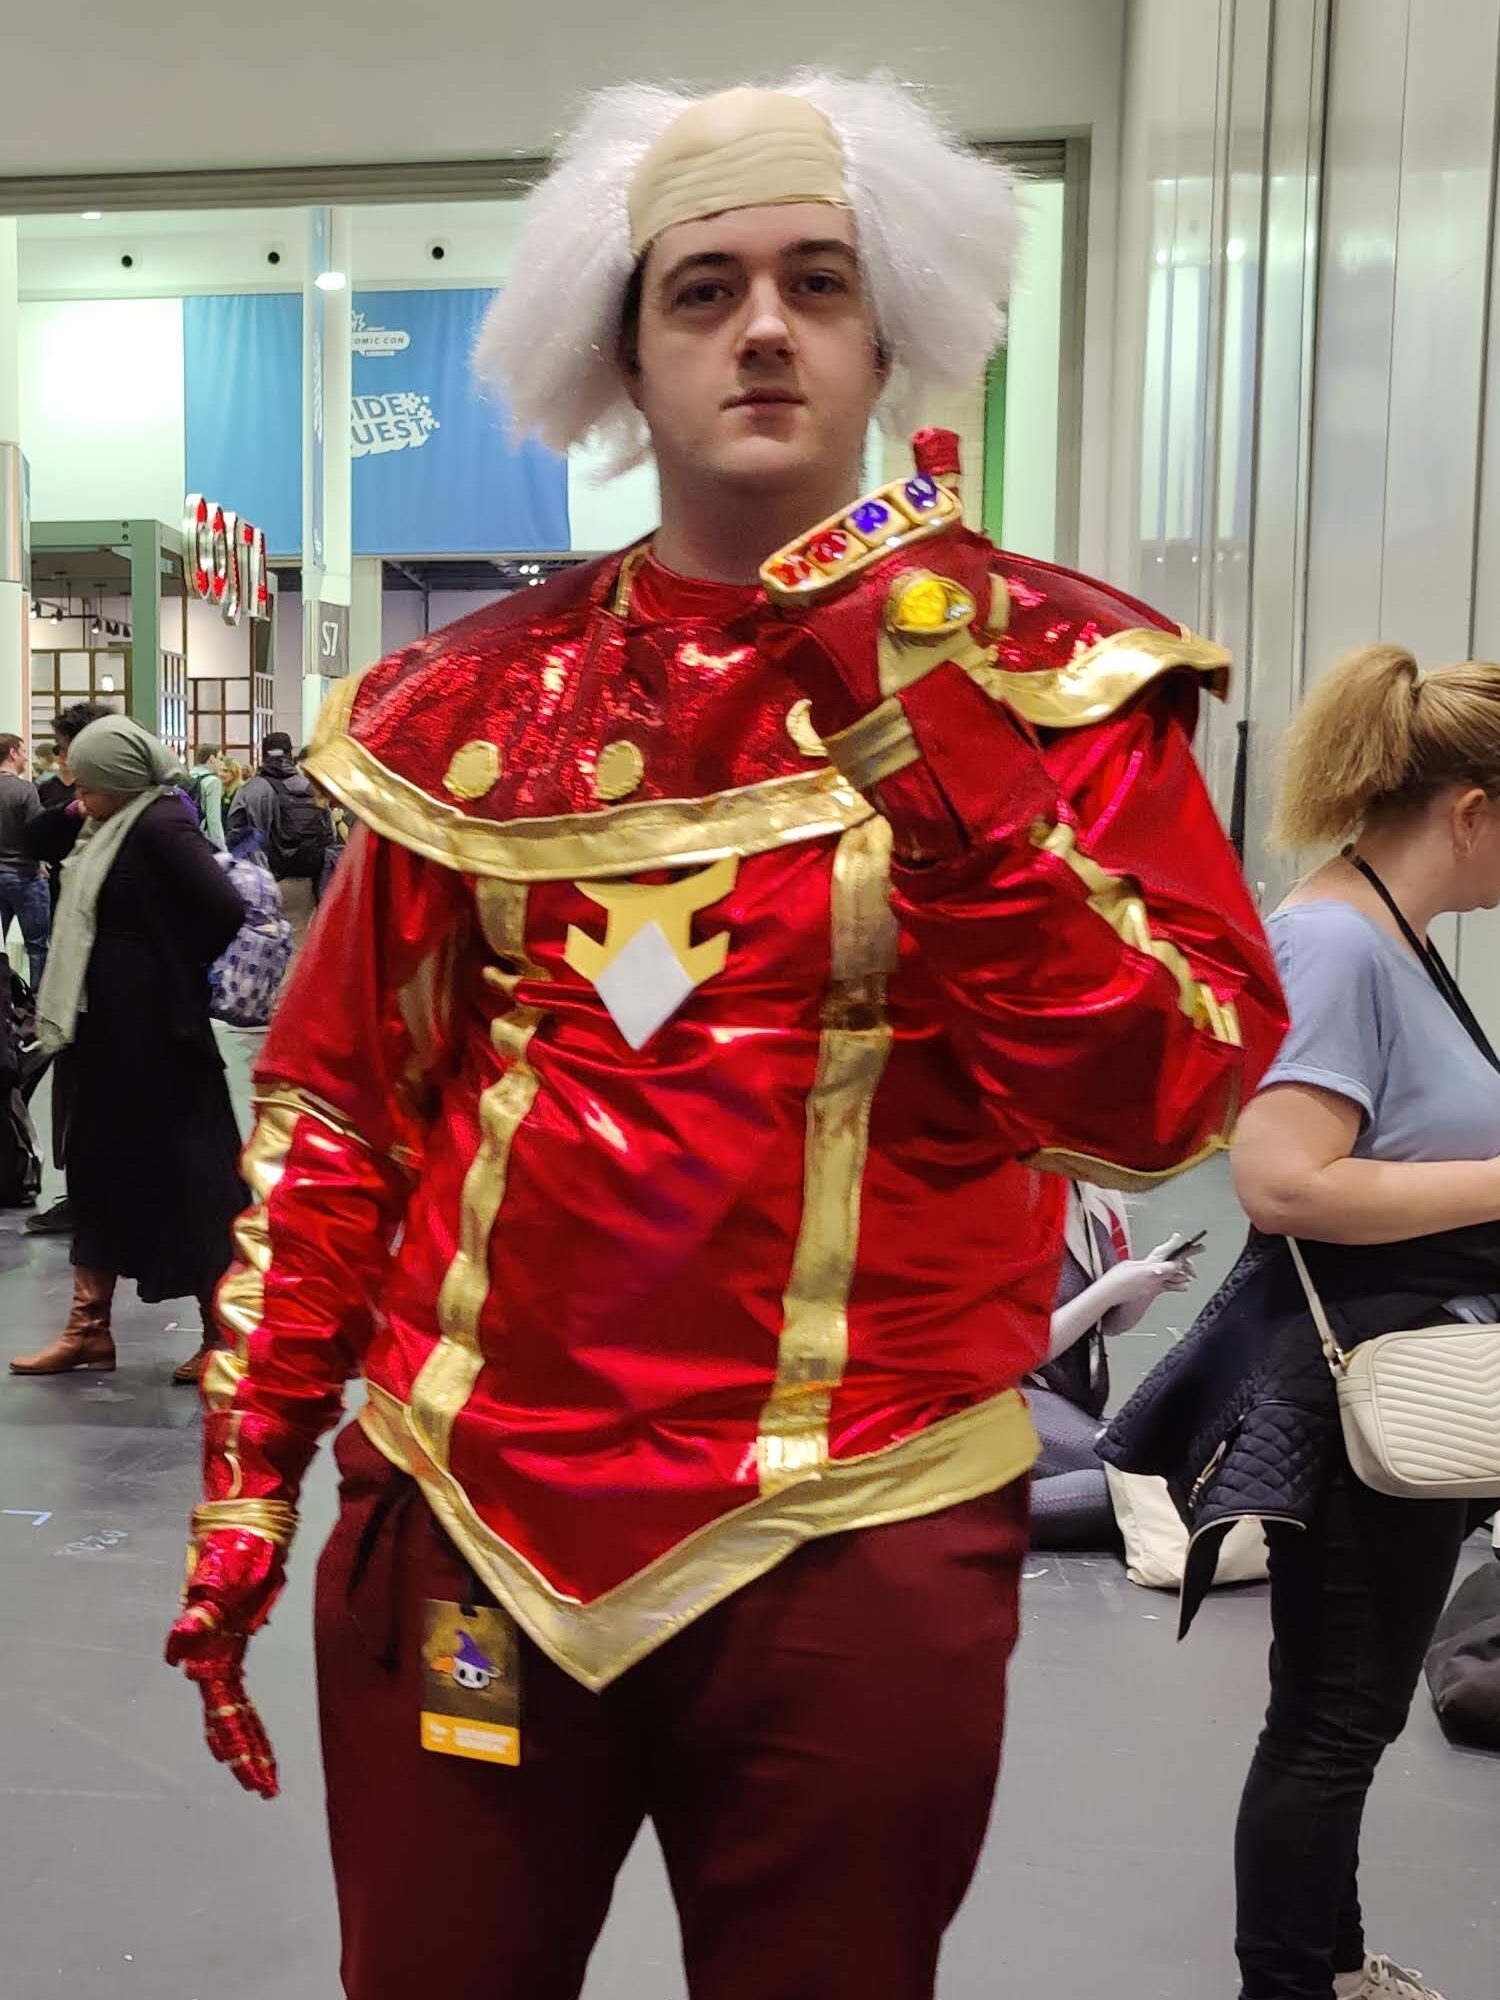
MCM Comic Con came around at the end of October 2022. Unfortunately time ran out to work on the lower half of the planned costume, but I had enough made to work with. I ordered a pair of maroon trousers that were intended to be the base for the lower portion of the costume, but would be close to the final colour to work without modification.
DMos final costume
The bald-white-hair wig was the closest I could find to Dungeon Master, and I didn’t think I could make one. I used a 4xAA battery pack in a pouch secured around the waist and a power lead routed down the left arm to the gauntlet.
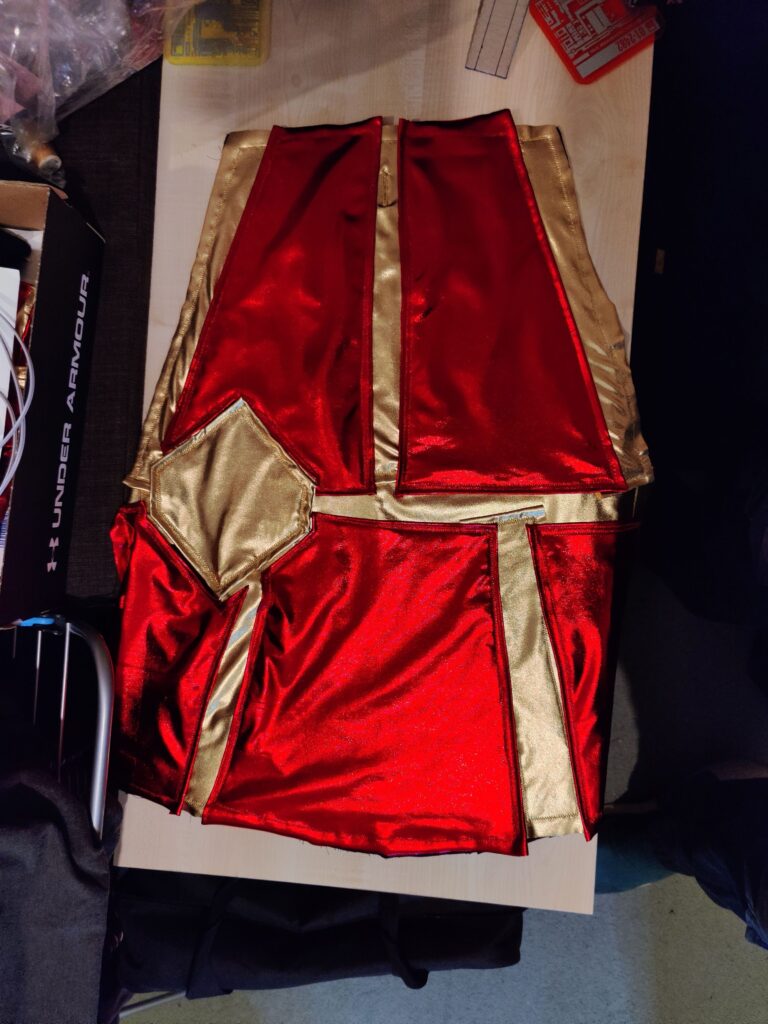
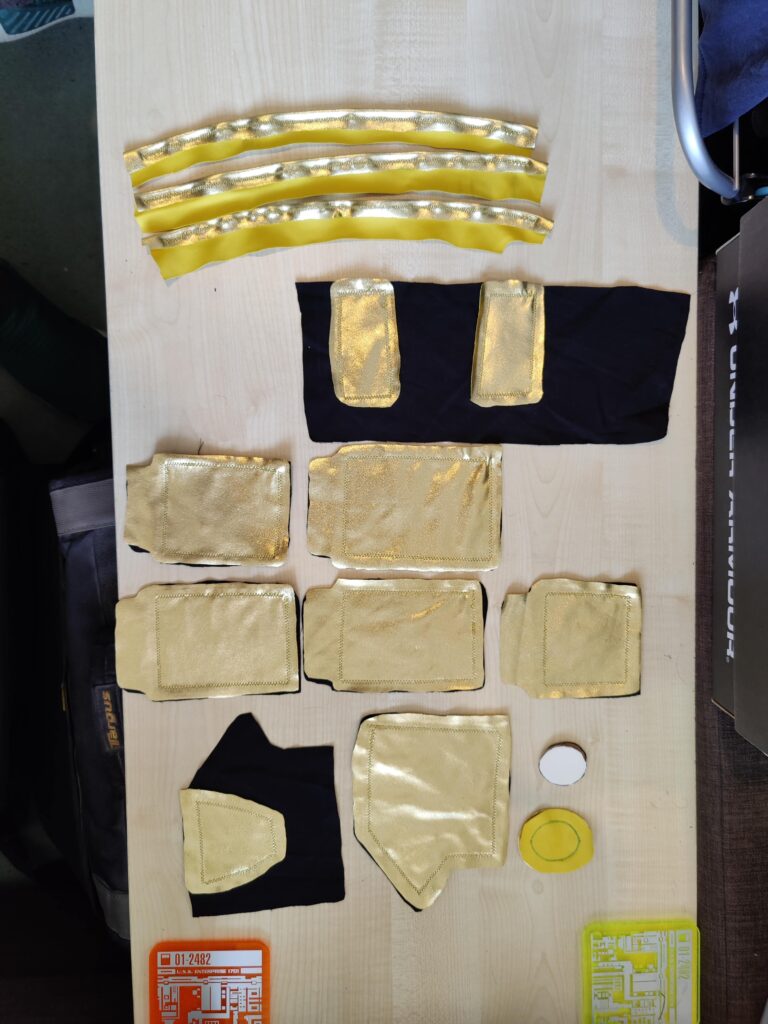
With the gauntlets made, the remainder of the costume was next. My original plan was to do a full-body costume, with trousers and boot-covers. However with looming time constraints I had to prioritise, which meant focusing on the upper body first. The upper body would be broken down into three main pieces: The sleeves, to be attached to a plain black sweater; the vest to be worn over the sleeves (and attached if time allowed) and the collar to be worn over the vest.
The Sleeves
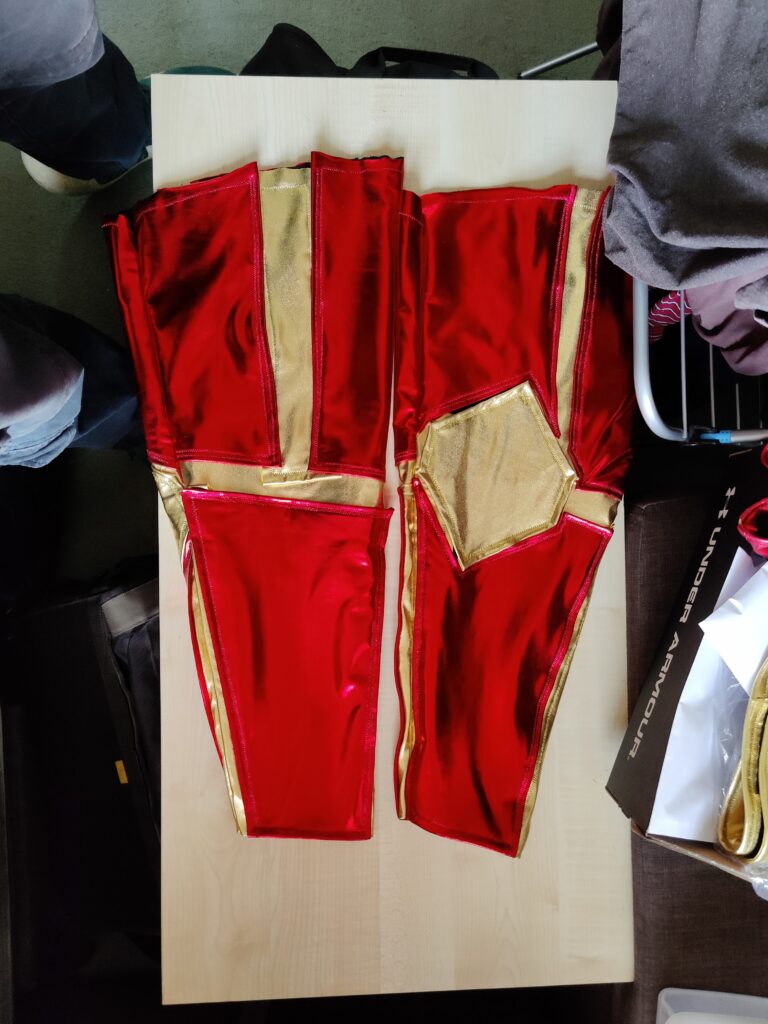
Measuring the black sweater as a template, I marked the rough location of my elbows while wearing the sweatshirt in order to estimate where on the pattern to place the elbow pad, and to work the design out around there. The design would involve sections of metallic red spandex as “plates” of armour separated by strips of gold spandex sewn underneath.
Black cotton with gold underlayerRed sections appliedBoth sleeves sewn into tubes
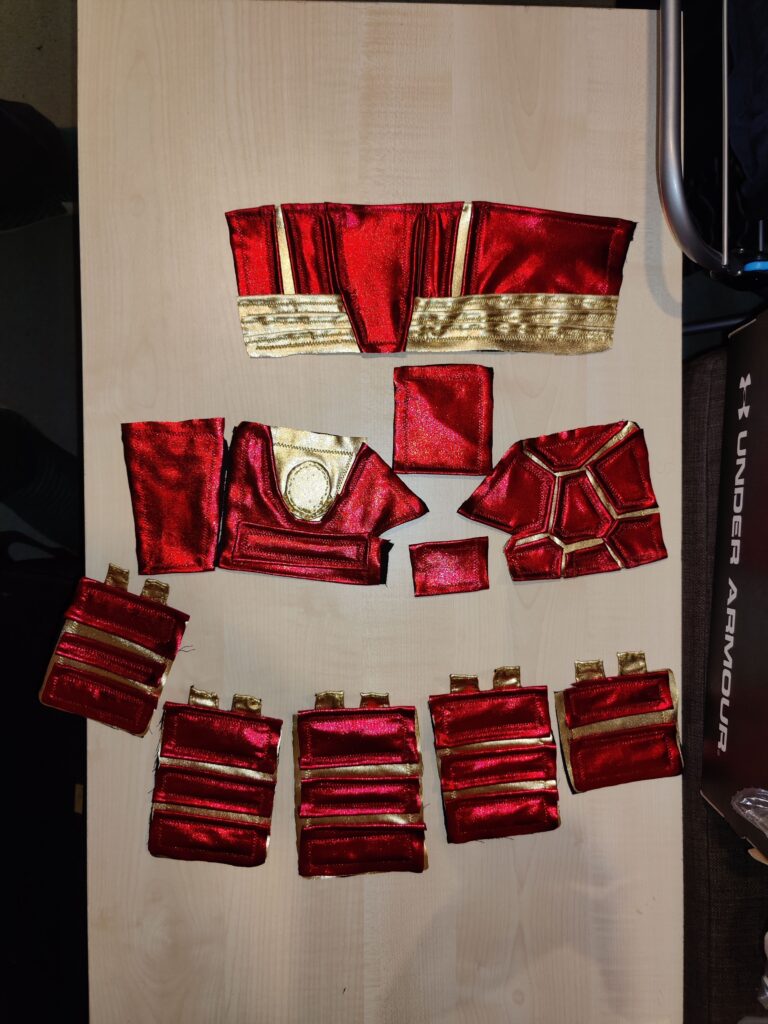
The Vest
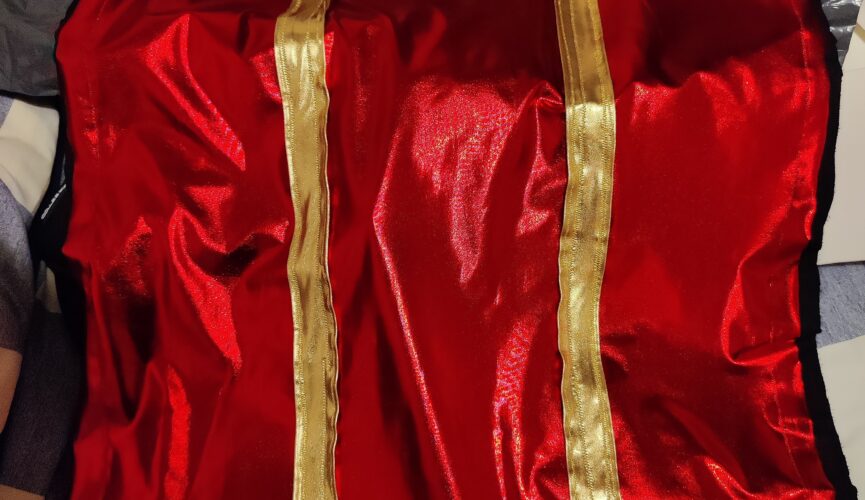
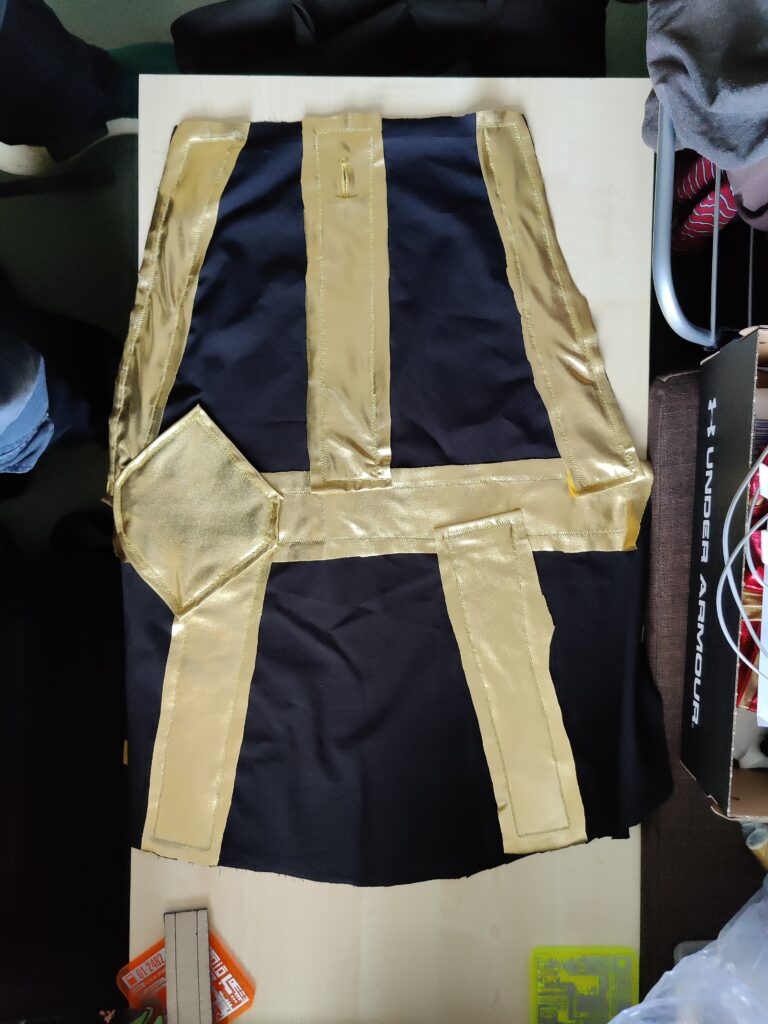
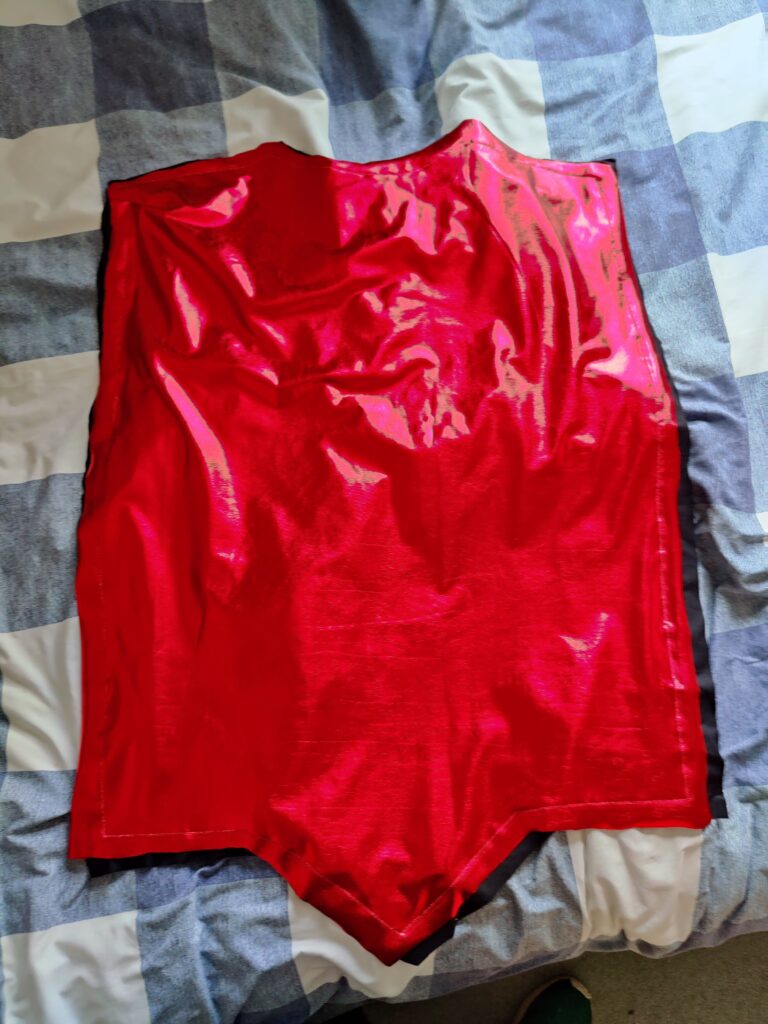
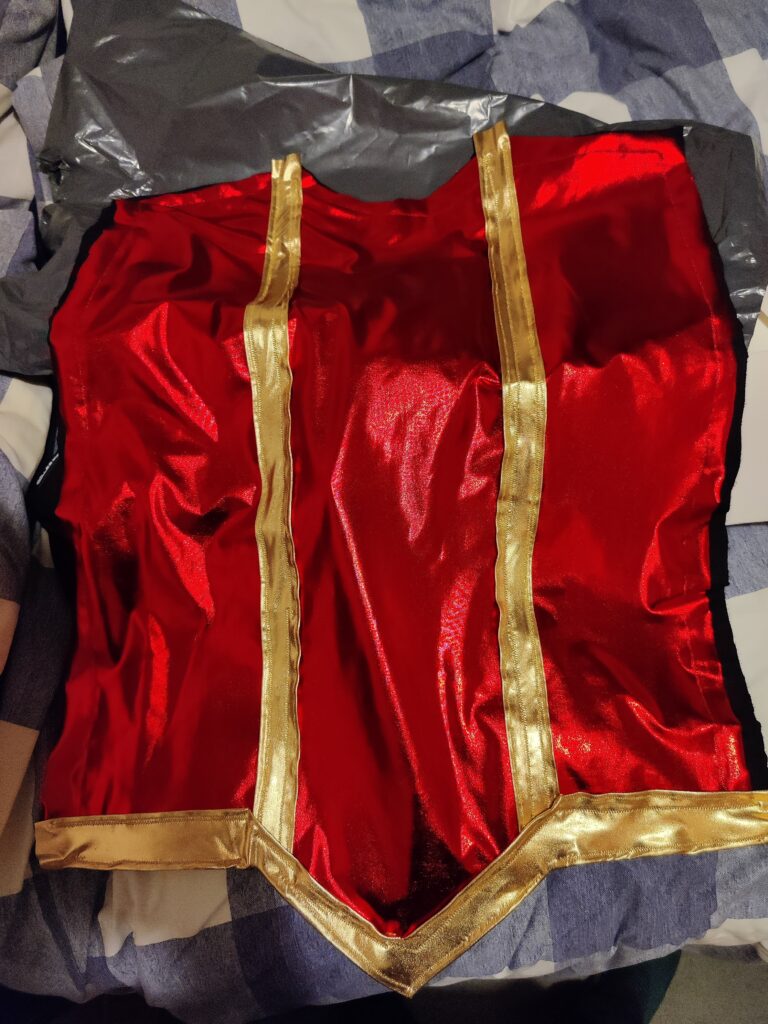
With limited knowledge of sewing patterns, I used the sweater again as a guide, combined with rough measurements of myself to get the sizing right. Knowing the limitations of my experience, I added some margin to these measurements, but in the end the vest still ended up very tight to wear. It involved two pieces, a front and back, with the red spandex as an underlayer and strips of gold spandex for a bottom border and vertical “seams” across the front.
Base layer (slightly misaligned)With gold features
Even with the walking foot sewing machine head (which was such a worthwhile purchase when dealing with the spandex) over longer seams and a greater number of thread breaks the alignment between the two base layers drifted noticeably, but not beyond the excess material I had left around the template. The rear section was similar to the first, lacking the V-shaped extension at the bottom and only featuring the lower horizontal border of gold.
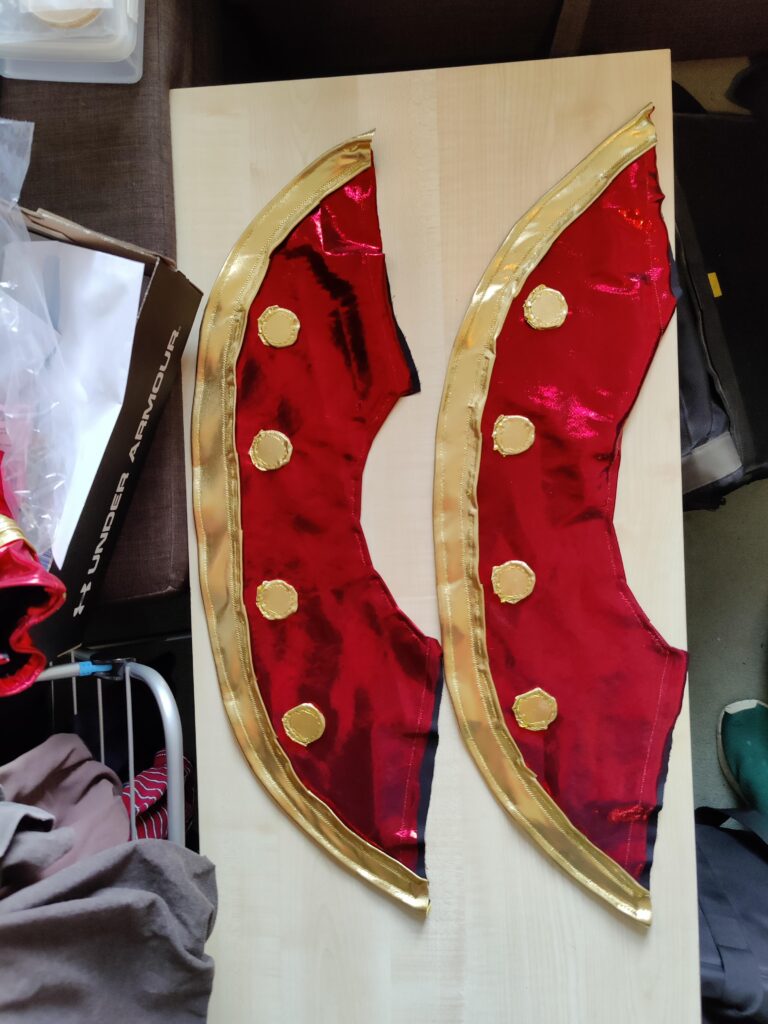
The Collar
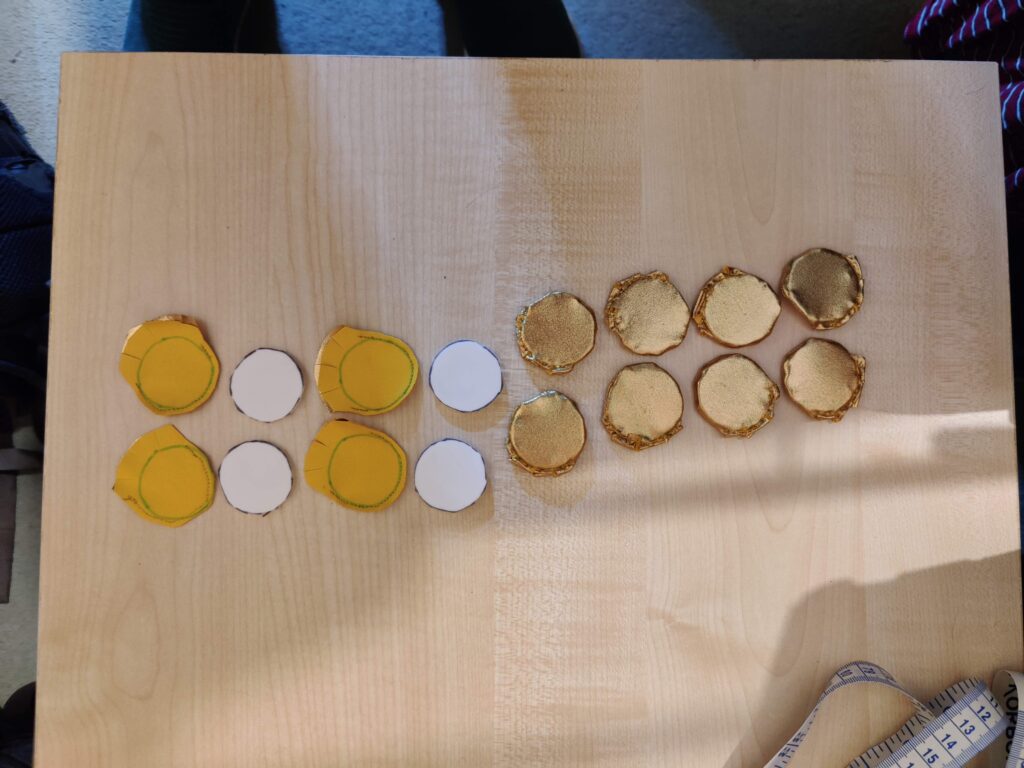
I created the collar using a darker metallic red fabric I had managed to find online. To create the gold “pips” I cut pieces of 3mm foam into circles and sewed a layer of gold spandex around them.
Gold collar pips being created
The collar was made from two pieces, with an outer border of gold spandex and eight coins/pips sewed on.
Darker metallic red base layerWith gold features added
The Necklace
An additional component was the Dungeon Master’s pendant or necklace. Lacking the time to design/print a more 3D version, I resorted to trusty old 3mm foam and hot glue to create a makeshift version.
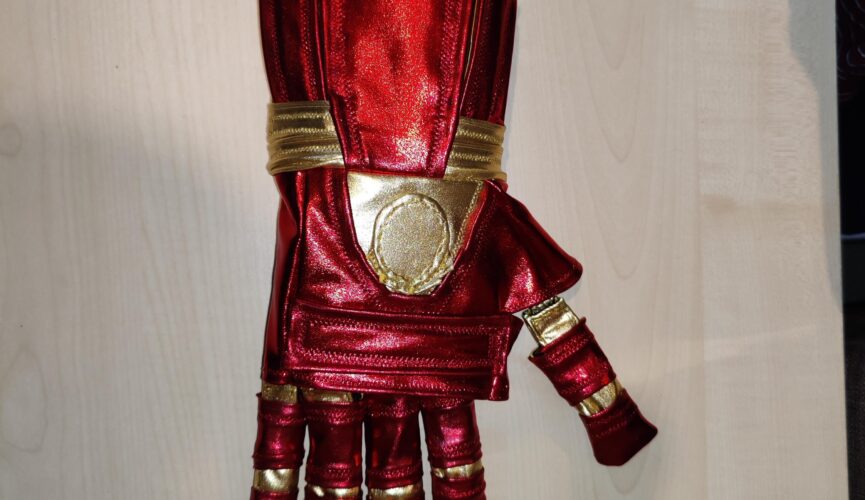
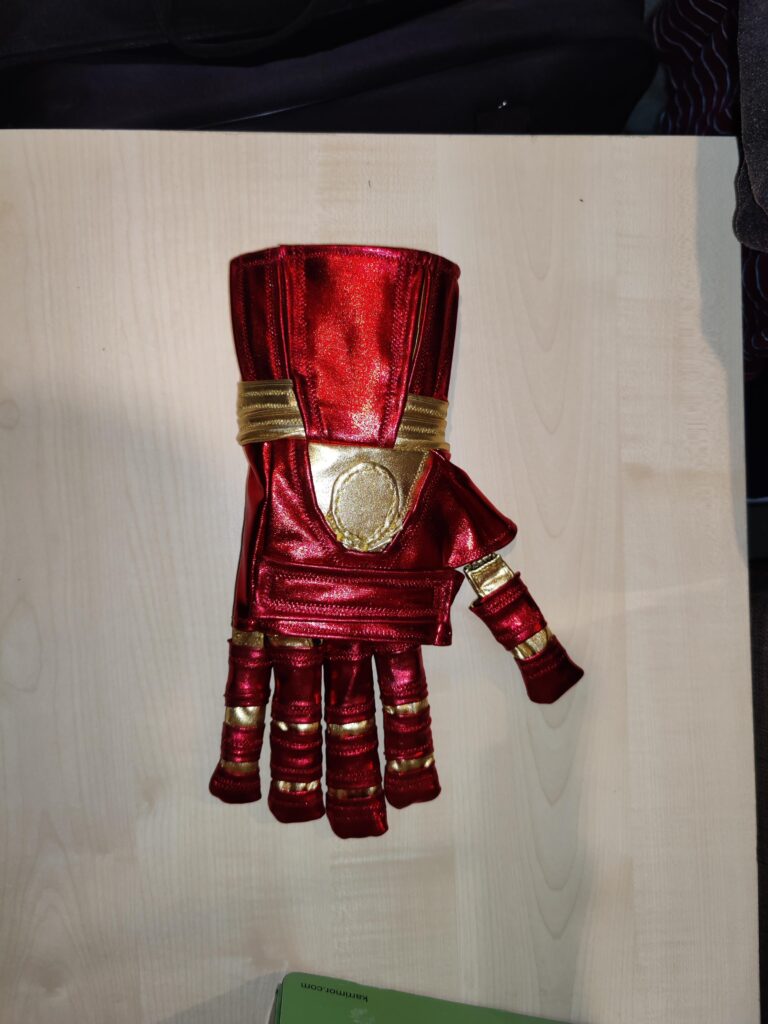
Creating the corresponding right-hand gauntlet for DMos was, predictably, a much easier and quicker process. With no circuit or inner layer and the templates for the outer design already crafted, the only real task was modifying the design to remove the dice mounts. This would be achieved by replacing the knuckle-mounted dice with a simple “bar” of metallic red spandex, and replacing the larger oval d20 mount on the back of the hand with a flat oval piece of gold spandex.
Base black cotton layer with first gold spandex layer
To help give the gold oval its shape, I used 3mm foam to cut an insert around which the material would be sewed. As with the other gauntlet, a base of black cotton was used, with an initial layer of gold spandex.
Right gauntlet pieces
As with the other gauntlet, the red and gold spandex had to be layered to achieve the desired design. Unlike the other gauntlet the outer layer was attached directly to the inner glove.
Right gauntlet assembled prior to attaching to glove
With the pieces of the gauntlet assembled, they just needed attaching to the inner glove in the same manner as before. The gauntlets were by far the more intricate aspects of the overall cosplay, but the remainder of the costume would be considerably larger and, with a temperamental thread all to happy to snap in the sewing machine, considerably more annoying to put together.
In the first of what I hope to be a number of retrospectives looking back at a few of my earlier cosplays, we roll the clock back to early 2018. Having had initial success with my Cyberman and War Doctor Cosplays at October MCM (2016 and 2017 respectively) this was the first time I would be attending the May comic con in costume. I would learn that designing costumes for specific conventions would require some consideration of the time of year, but this costume may have been the one to teach me that lesson.
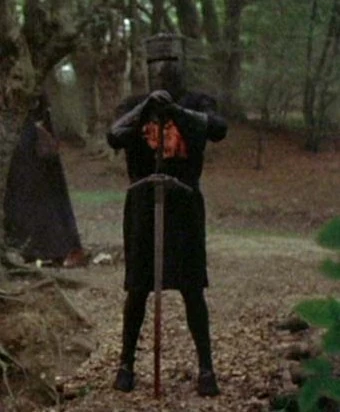
With a couple of solid Dr Who costumes under my belt I wanted to branch out a little. Monty Python had always been a favourite in my household growing up, and the Holy Grail seemed a good medieval fantasy aesthetic with which to break out of my Science Fiction cosplay roots.
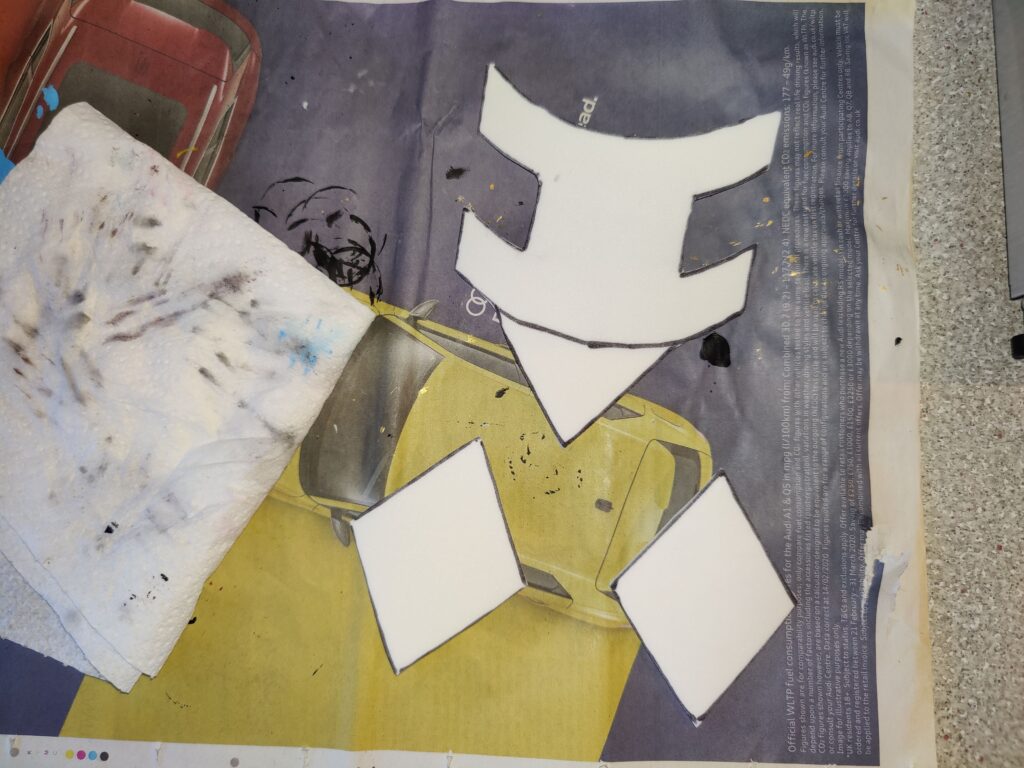
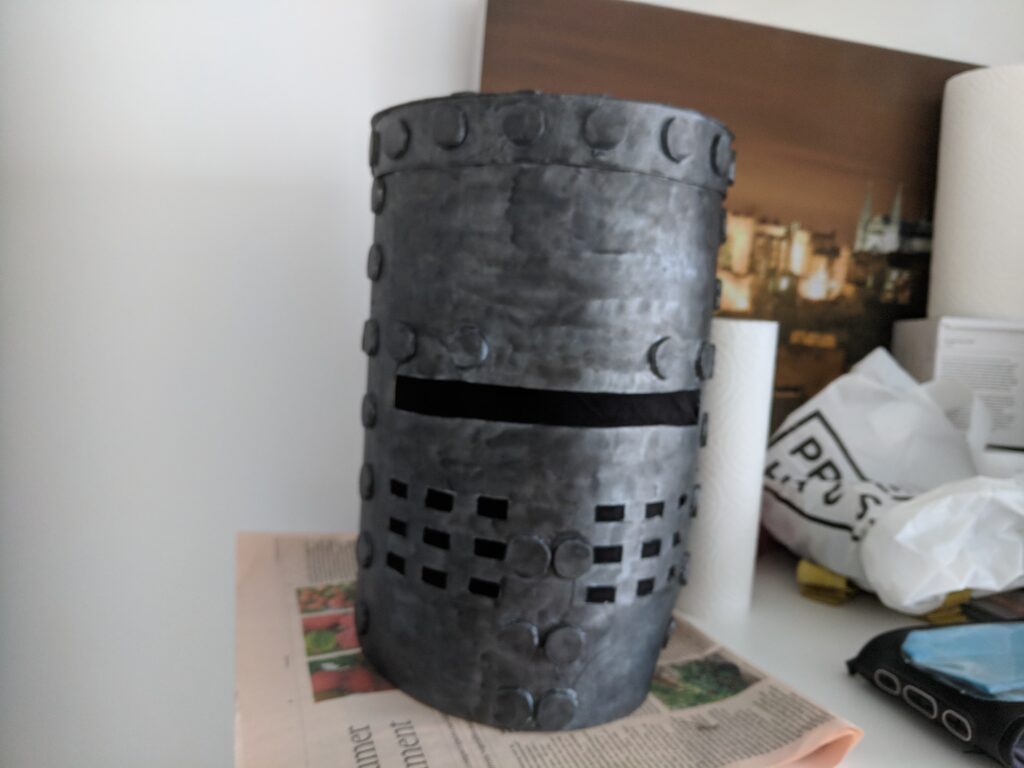
As with all my cosplays I intended to make at least one component from scratch, and evidently the helmet would be the prime candidate, and thus the focus of my efforts. The rest, including a LARP-safe sword, I would seek to purchase, along with inkjet-printable iron-on transfer paper for the symbol on the tunic. I sourced a close-up screenshot of the helmet to use as a reference.
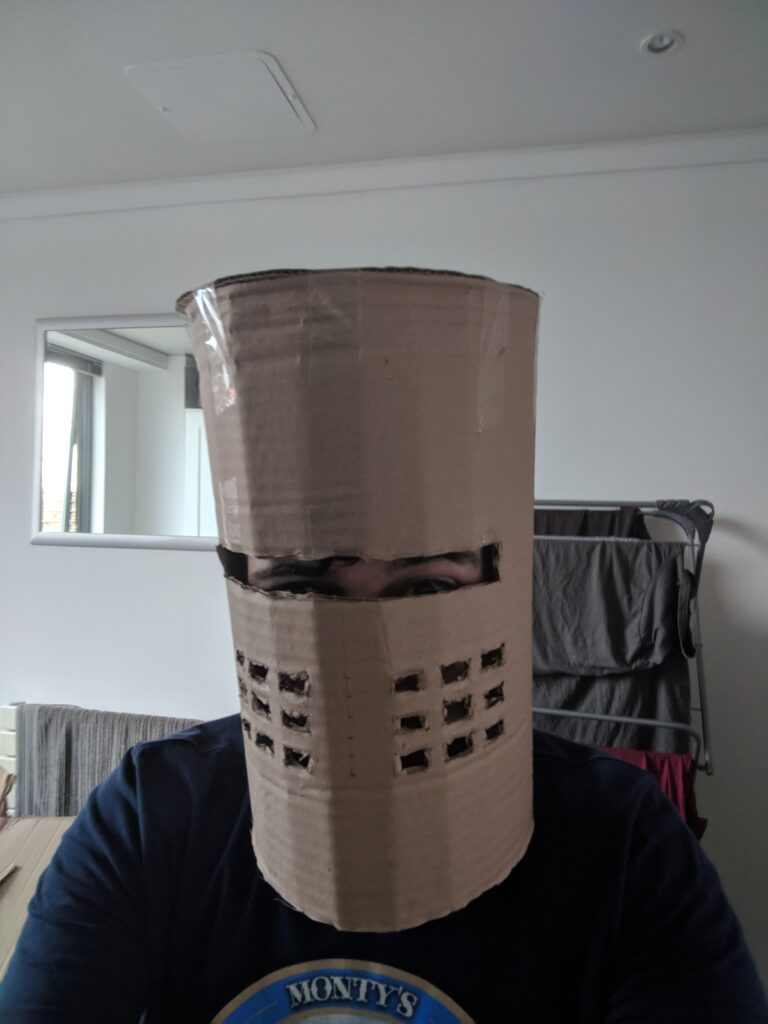
The plan was to use two layers for the helmet: An inner layer of 3mm foam for comfort, and an outer layer of Cosplayflex thermoplastic for the outer layer. Between the two layers I would sandwich a layer of thin black fabric (sourced from a pair of tights) to obscure the inside of the helmet whilst maintaining some visibility. As I had not worked with Cosplayflex before, I considered this the new material/skill I would encounter for this project. The first step was, of course, the cardboard prototype, to check and confirm measurements and fit:
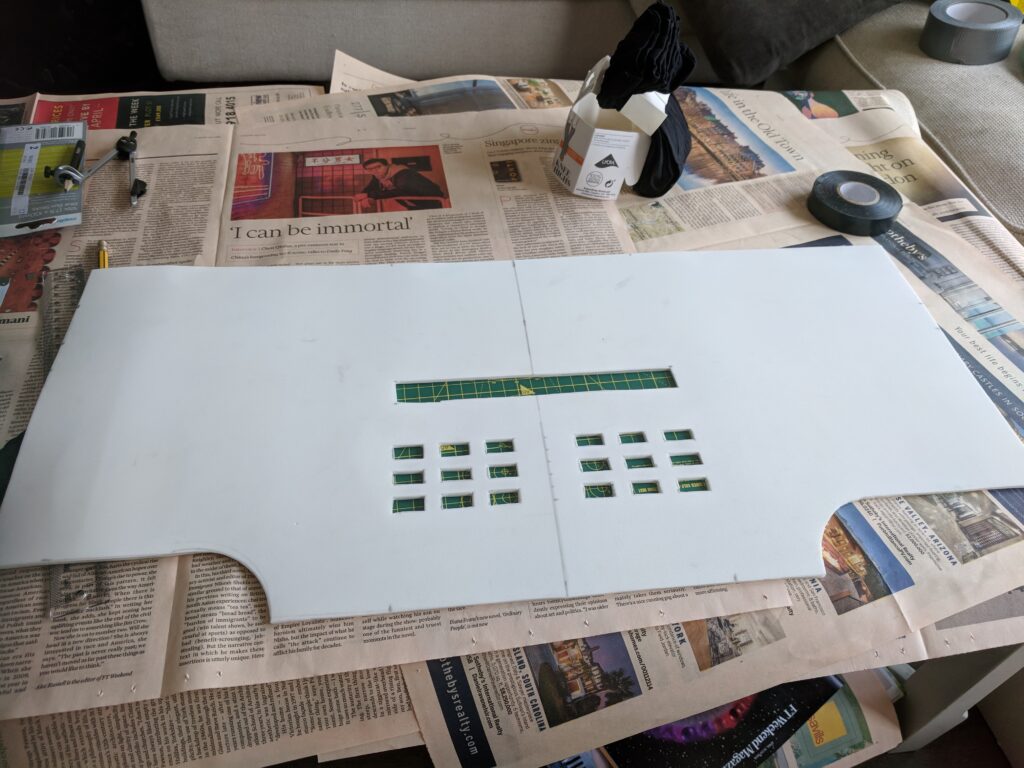
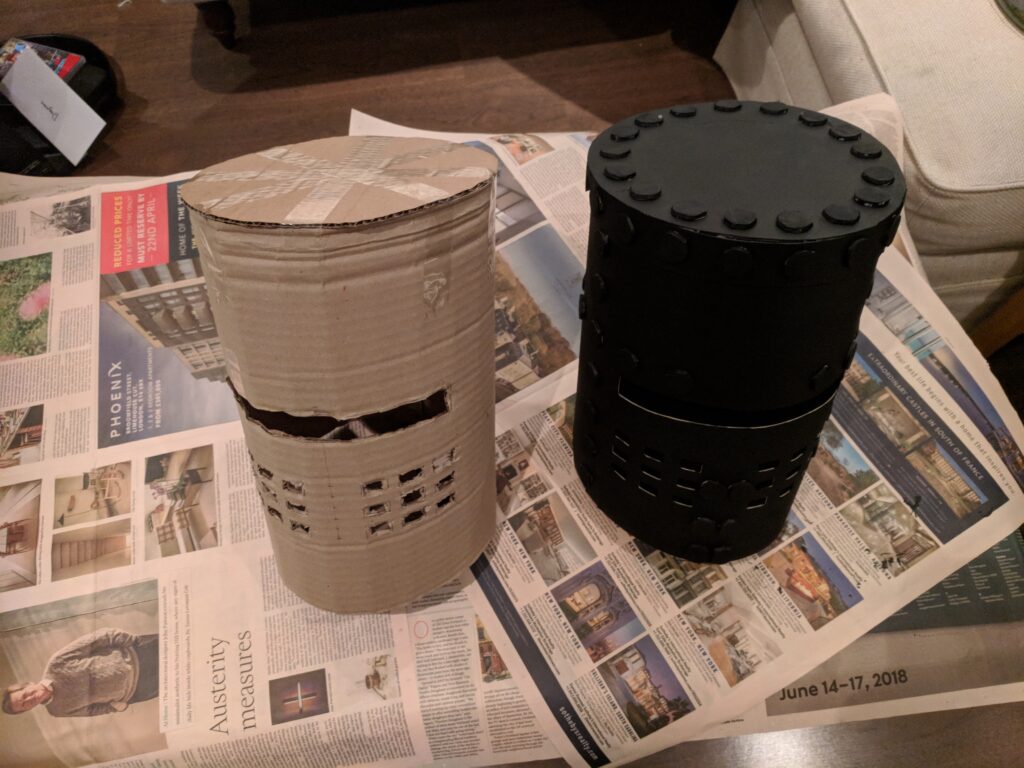
Cardboard Prototype
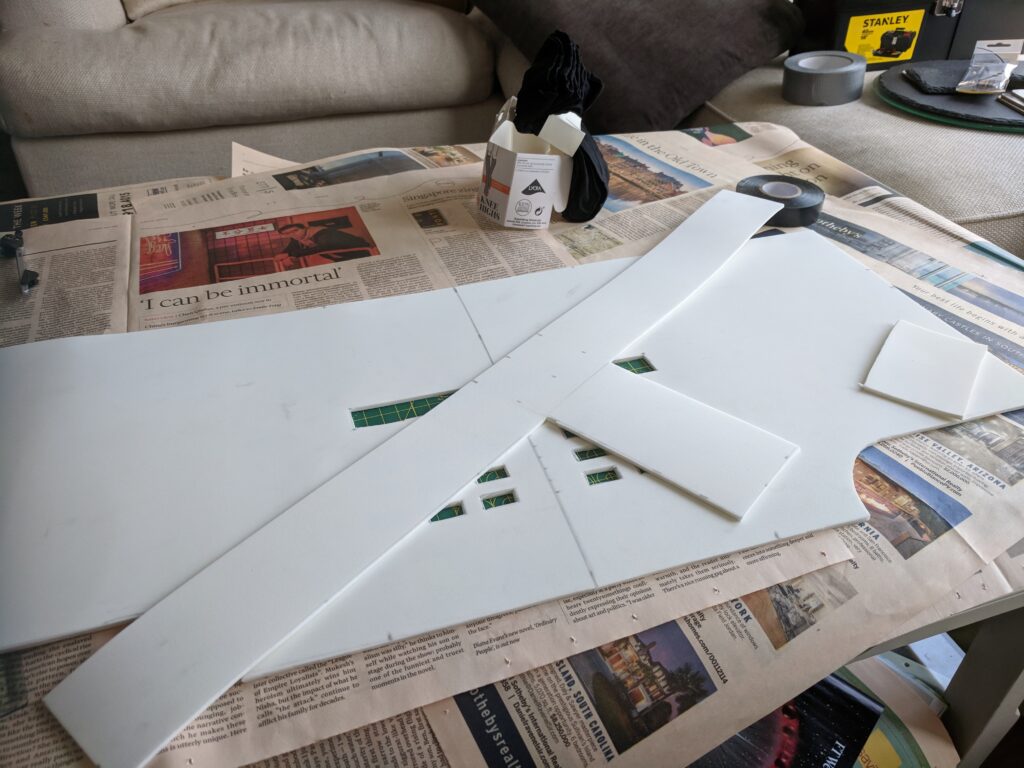
A few adjustments to line up the eye slit correctly were required, but overall the prototype was a success, so I felt confident moving on to the actual manufacture. First I focused on cutting the 3mm foam inner layer, along with a circular T-shaped piece, the goal of which was to go around the inside at approximately ear-level to hopefully secure the helmet at the correct height, as well as provide a joining surface for the seam at the back of the helmet.
3mm foam layerT-shaped section for patching the seam
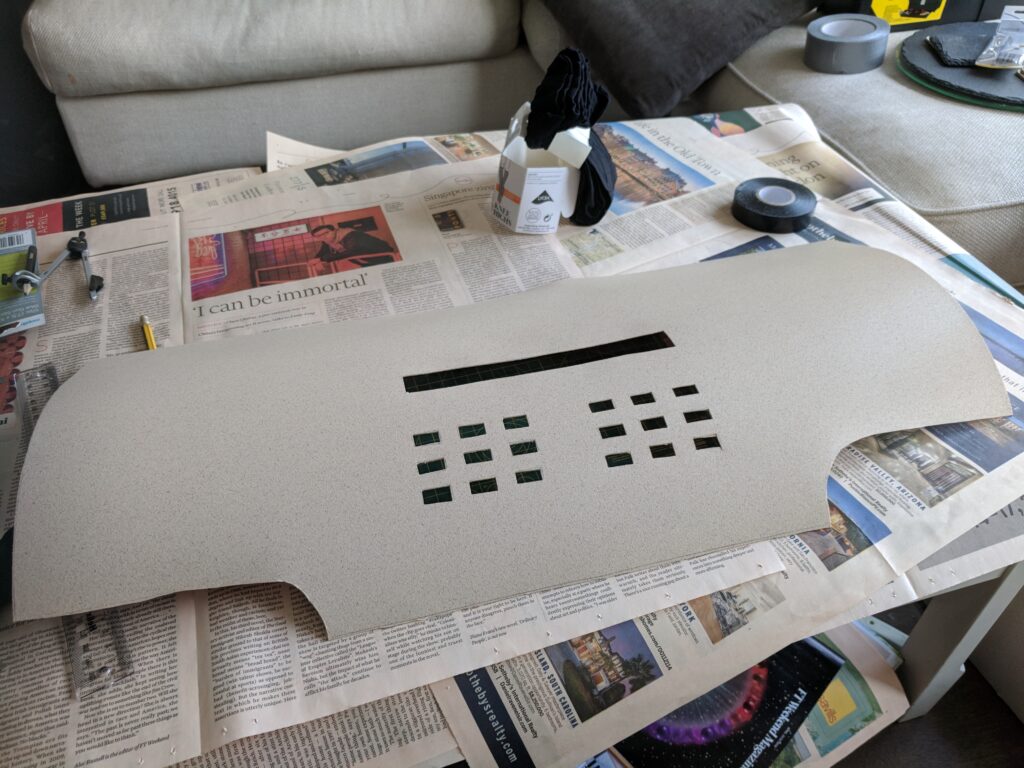
I had originally purchased a heat gun so that I could try and mould the Cosplayflex to the desired shape, but given it came as a roll already it seemed to fit a cylindrical design without the need for it.
Outer Cosplayflex layer
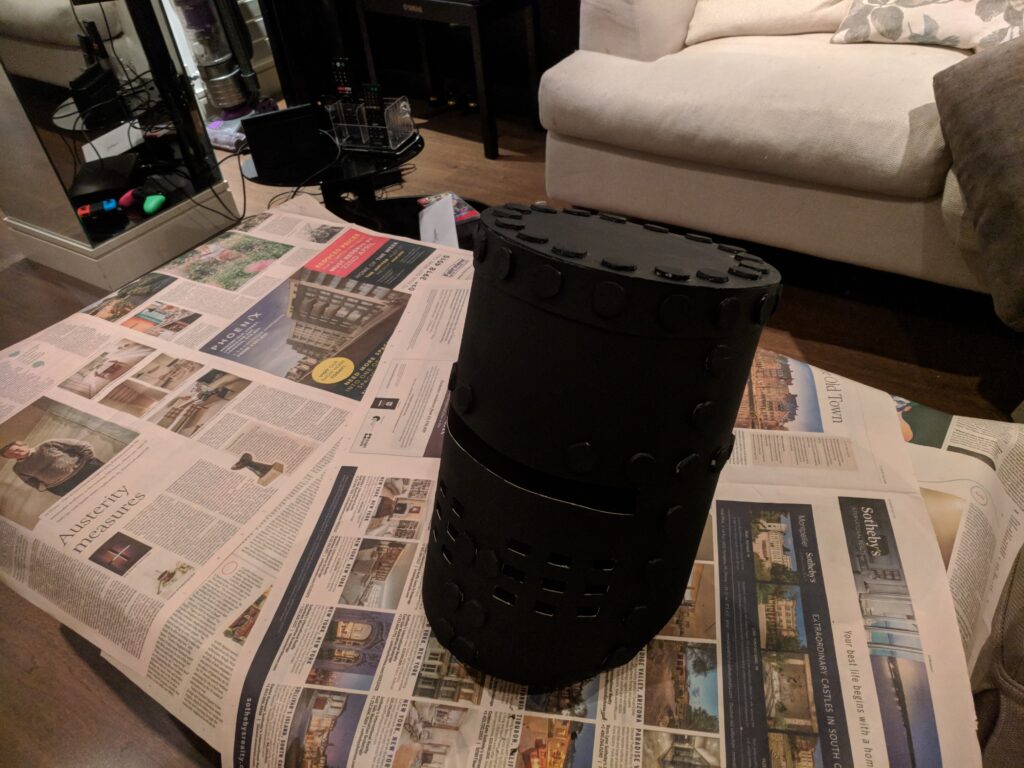
The Cosplayflex was surprisingly easy to work with, even using scissors and a craft knife to cut the pieces. I cut a circular piece for the helmet top from both 3mm foam and plastic, as well as a narrow rectangular piece of the plastic to patch over and reinforce the back seam. Then it was a matter of lots of hot glue, as well as the addition of the “rivets” which I simply cut from more 3mm foam. I also added a top ring of plastic.
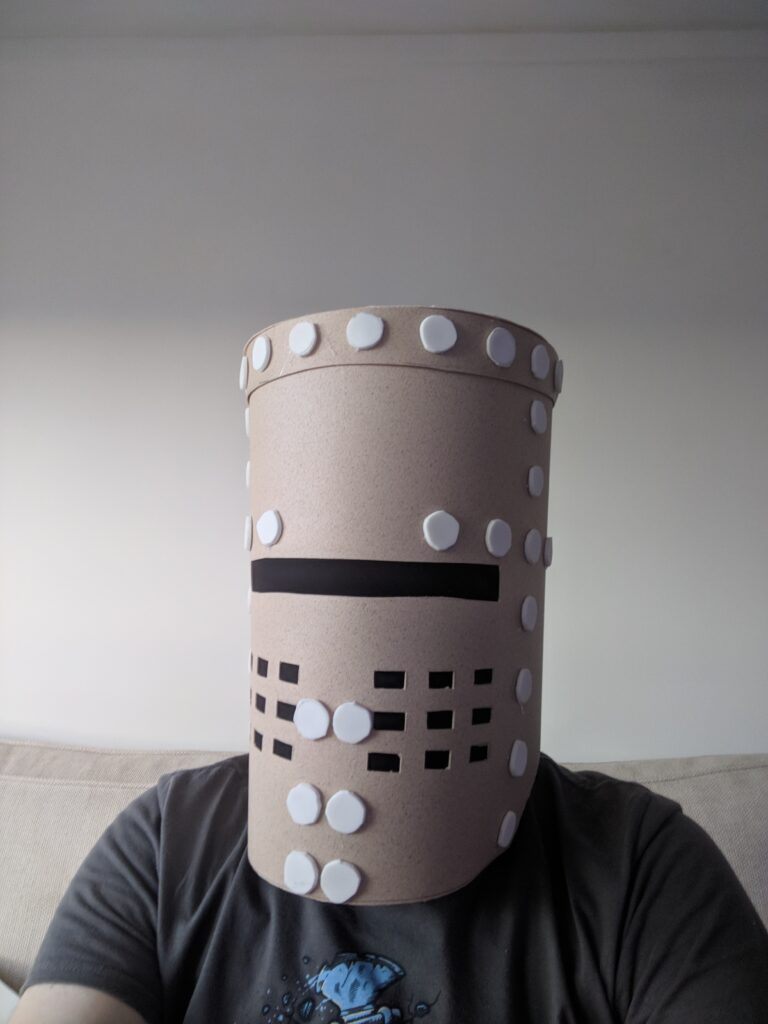
Final product prior to paintingFit test
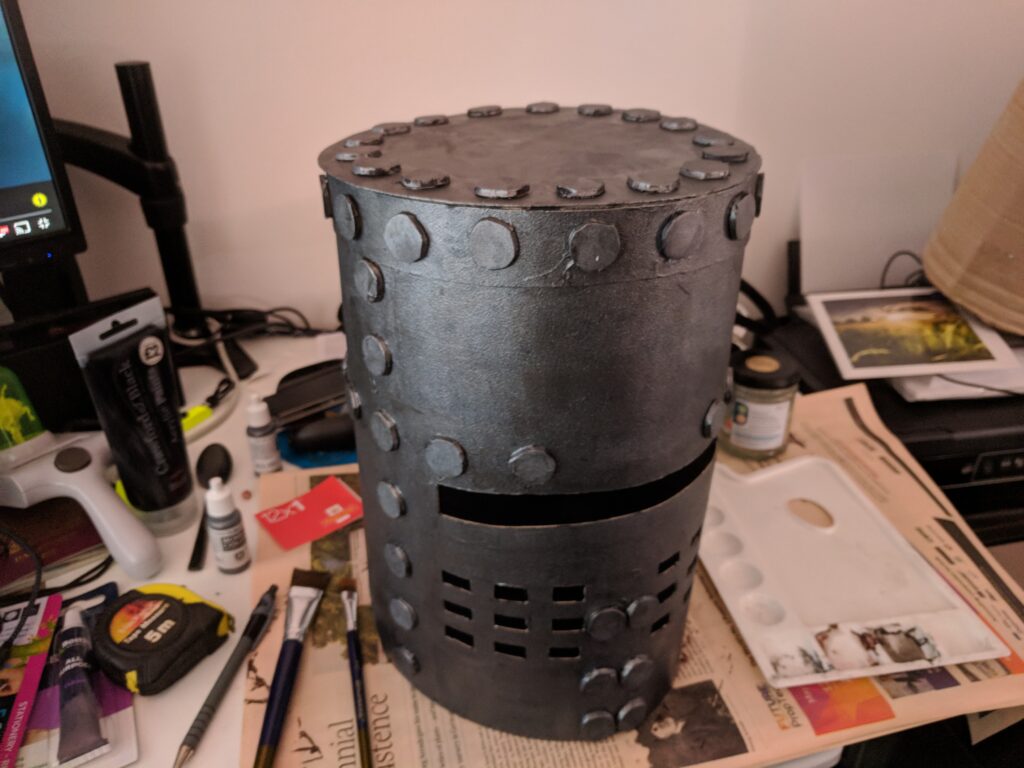
Painting the helmet involved a base layer of black, followed by a layer of “Natural Steel” metallic paint (two layers of each) followed by a black wash.
Black base coatAlongside prototypeSteel colour coatWith a black wash finish
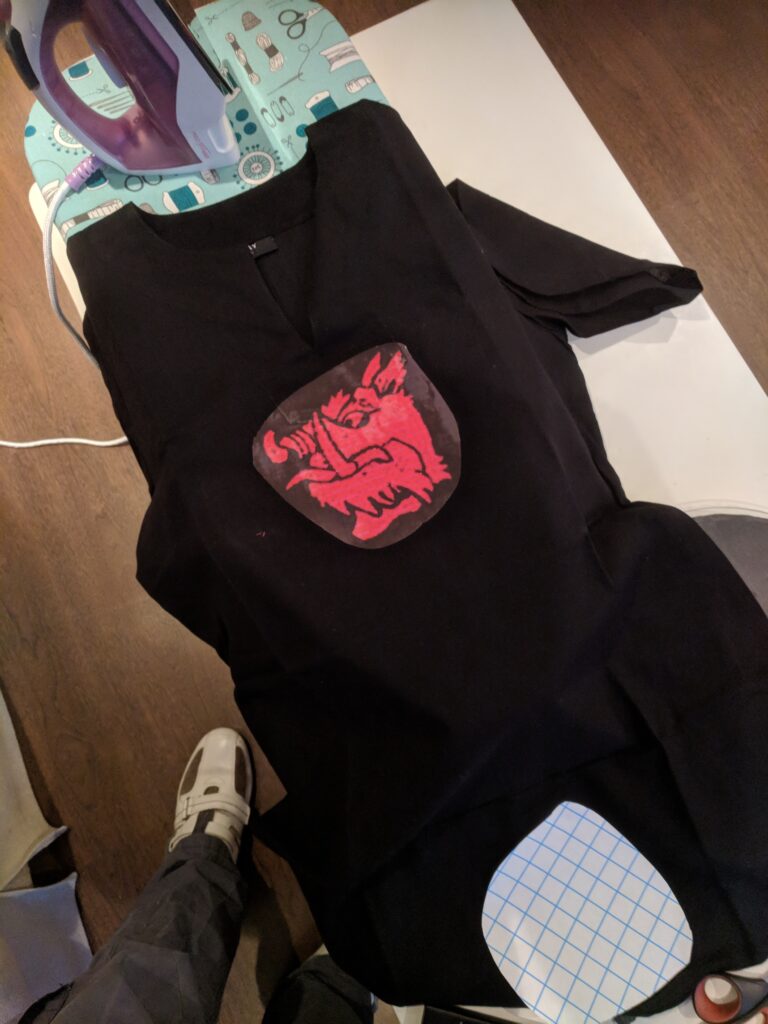
The only other piece of the costume that I had to create was the tunic, which was the combination of a black medieval costume tunic with an iron-on transfer (which unfortunately limited the size of the image I could apply to A4).
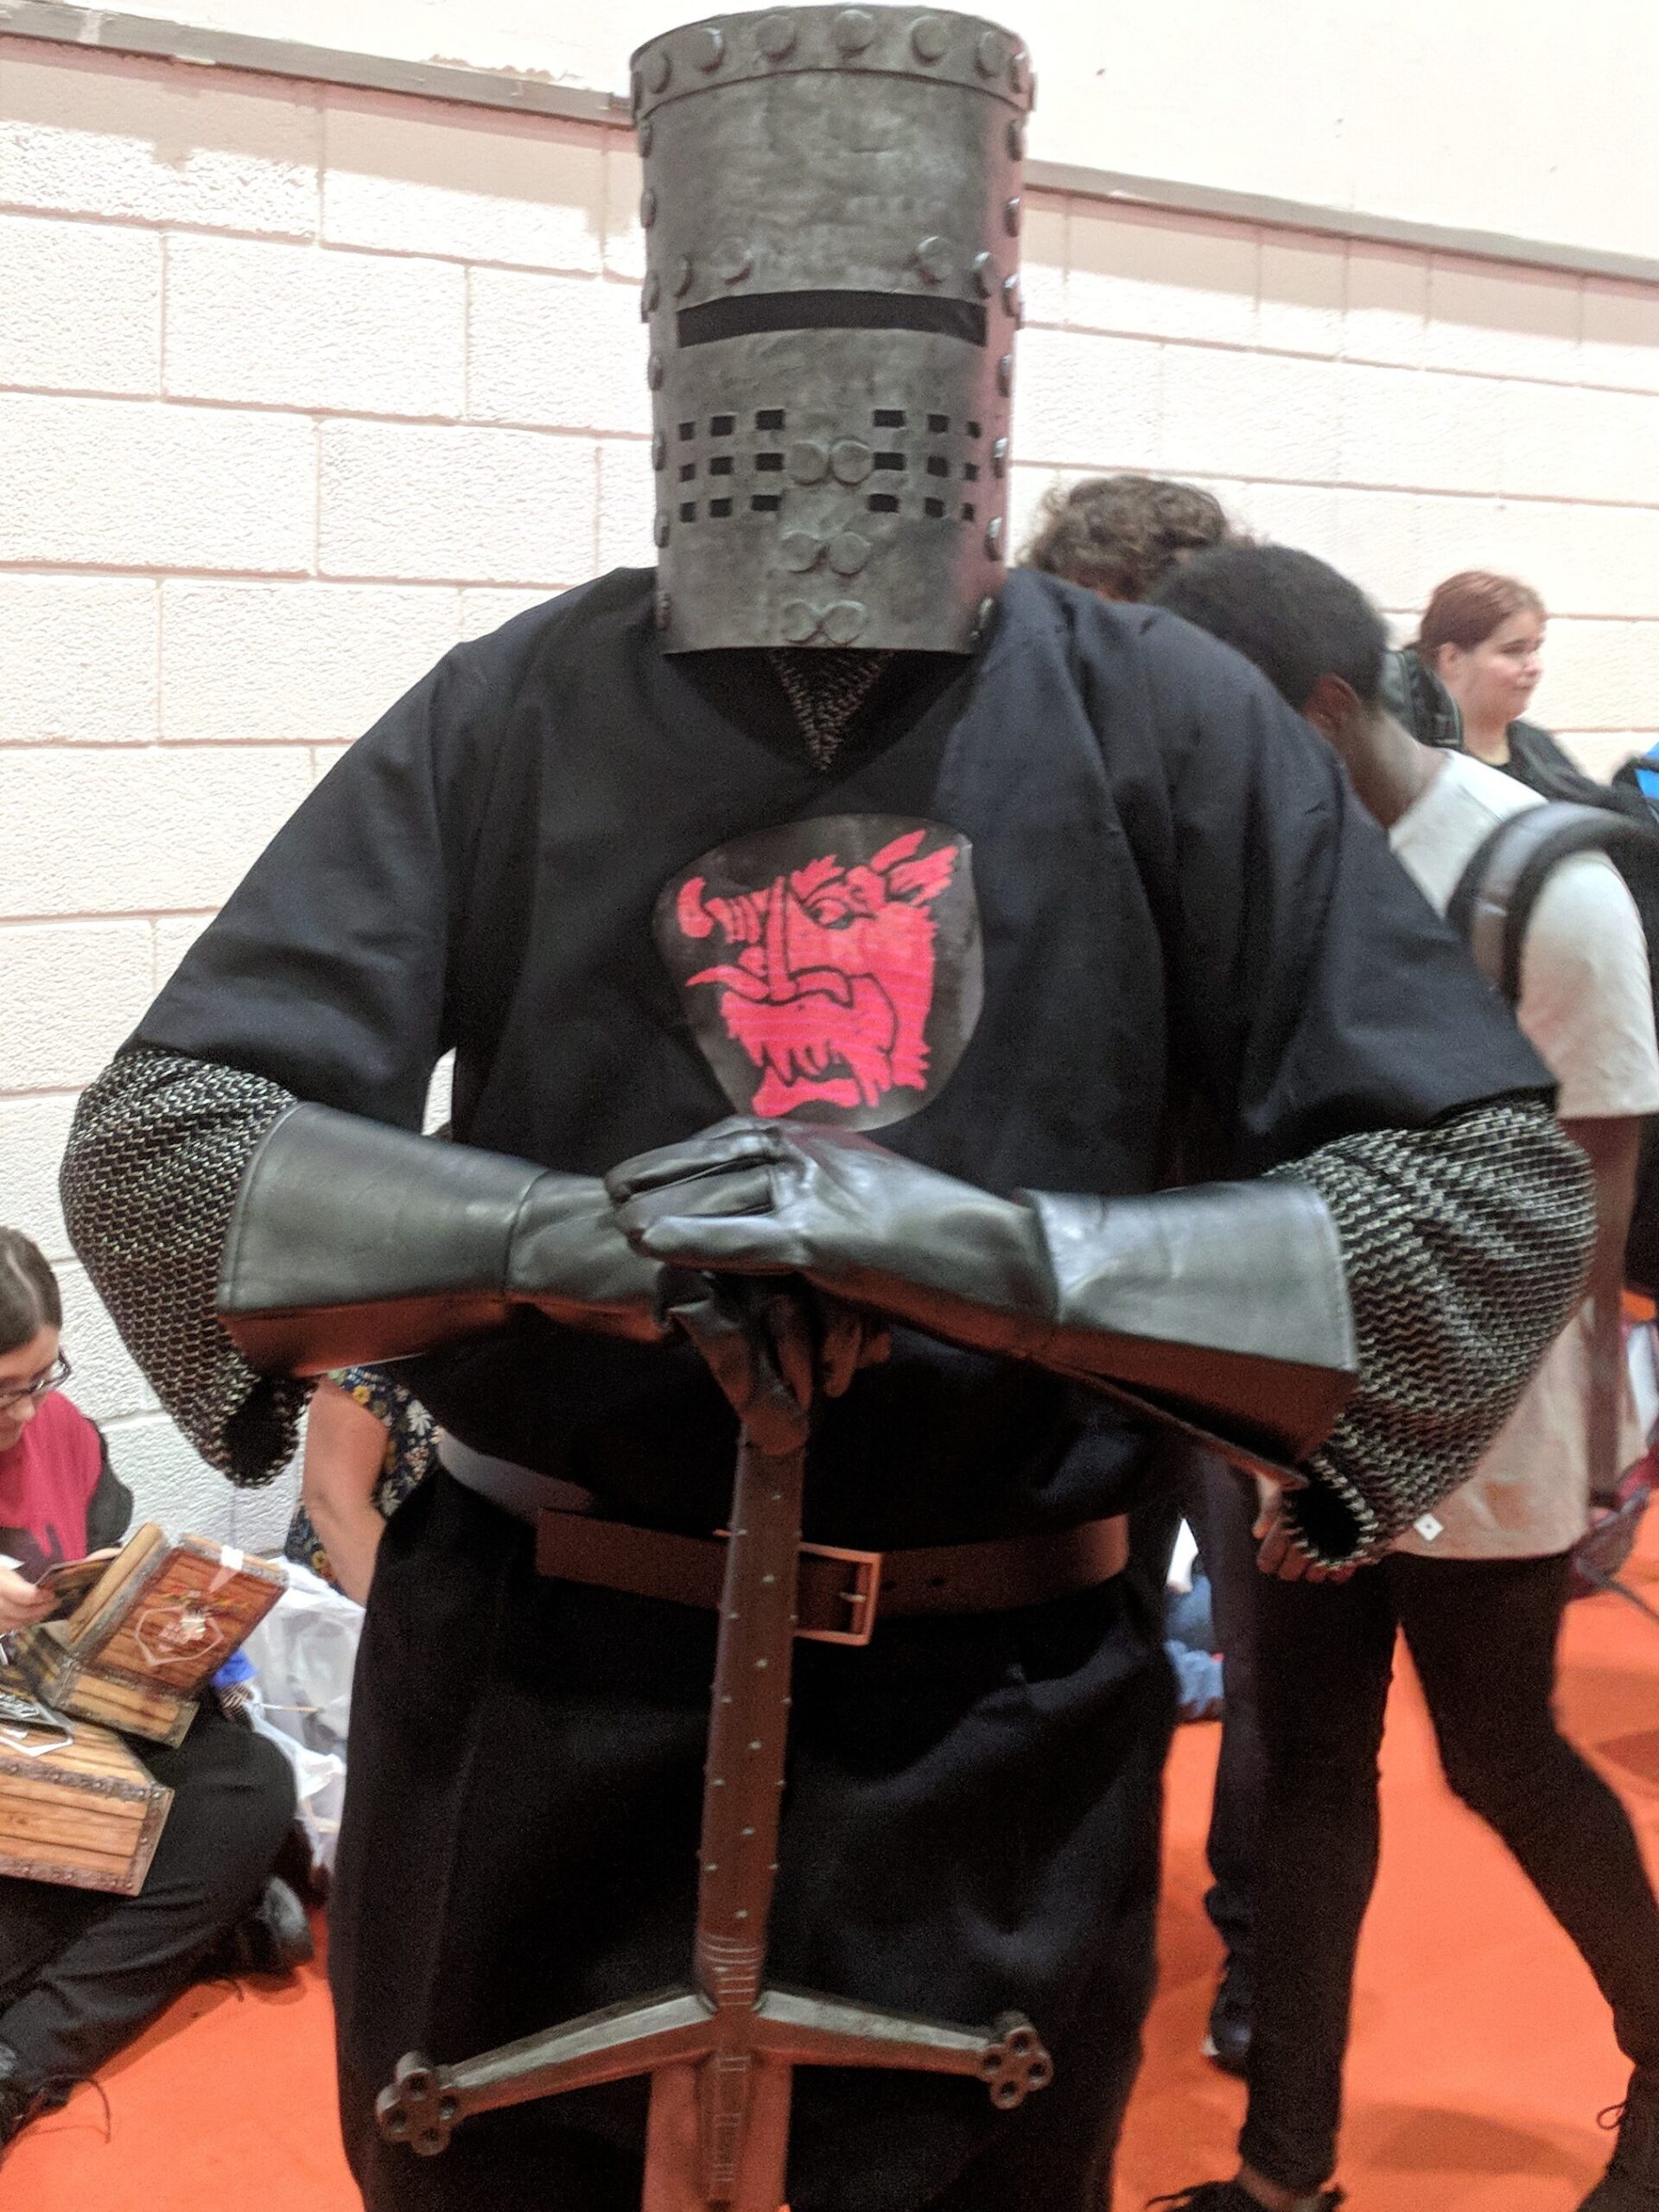
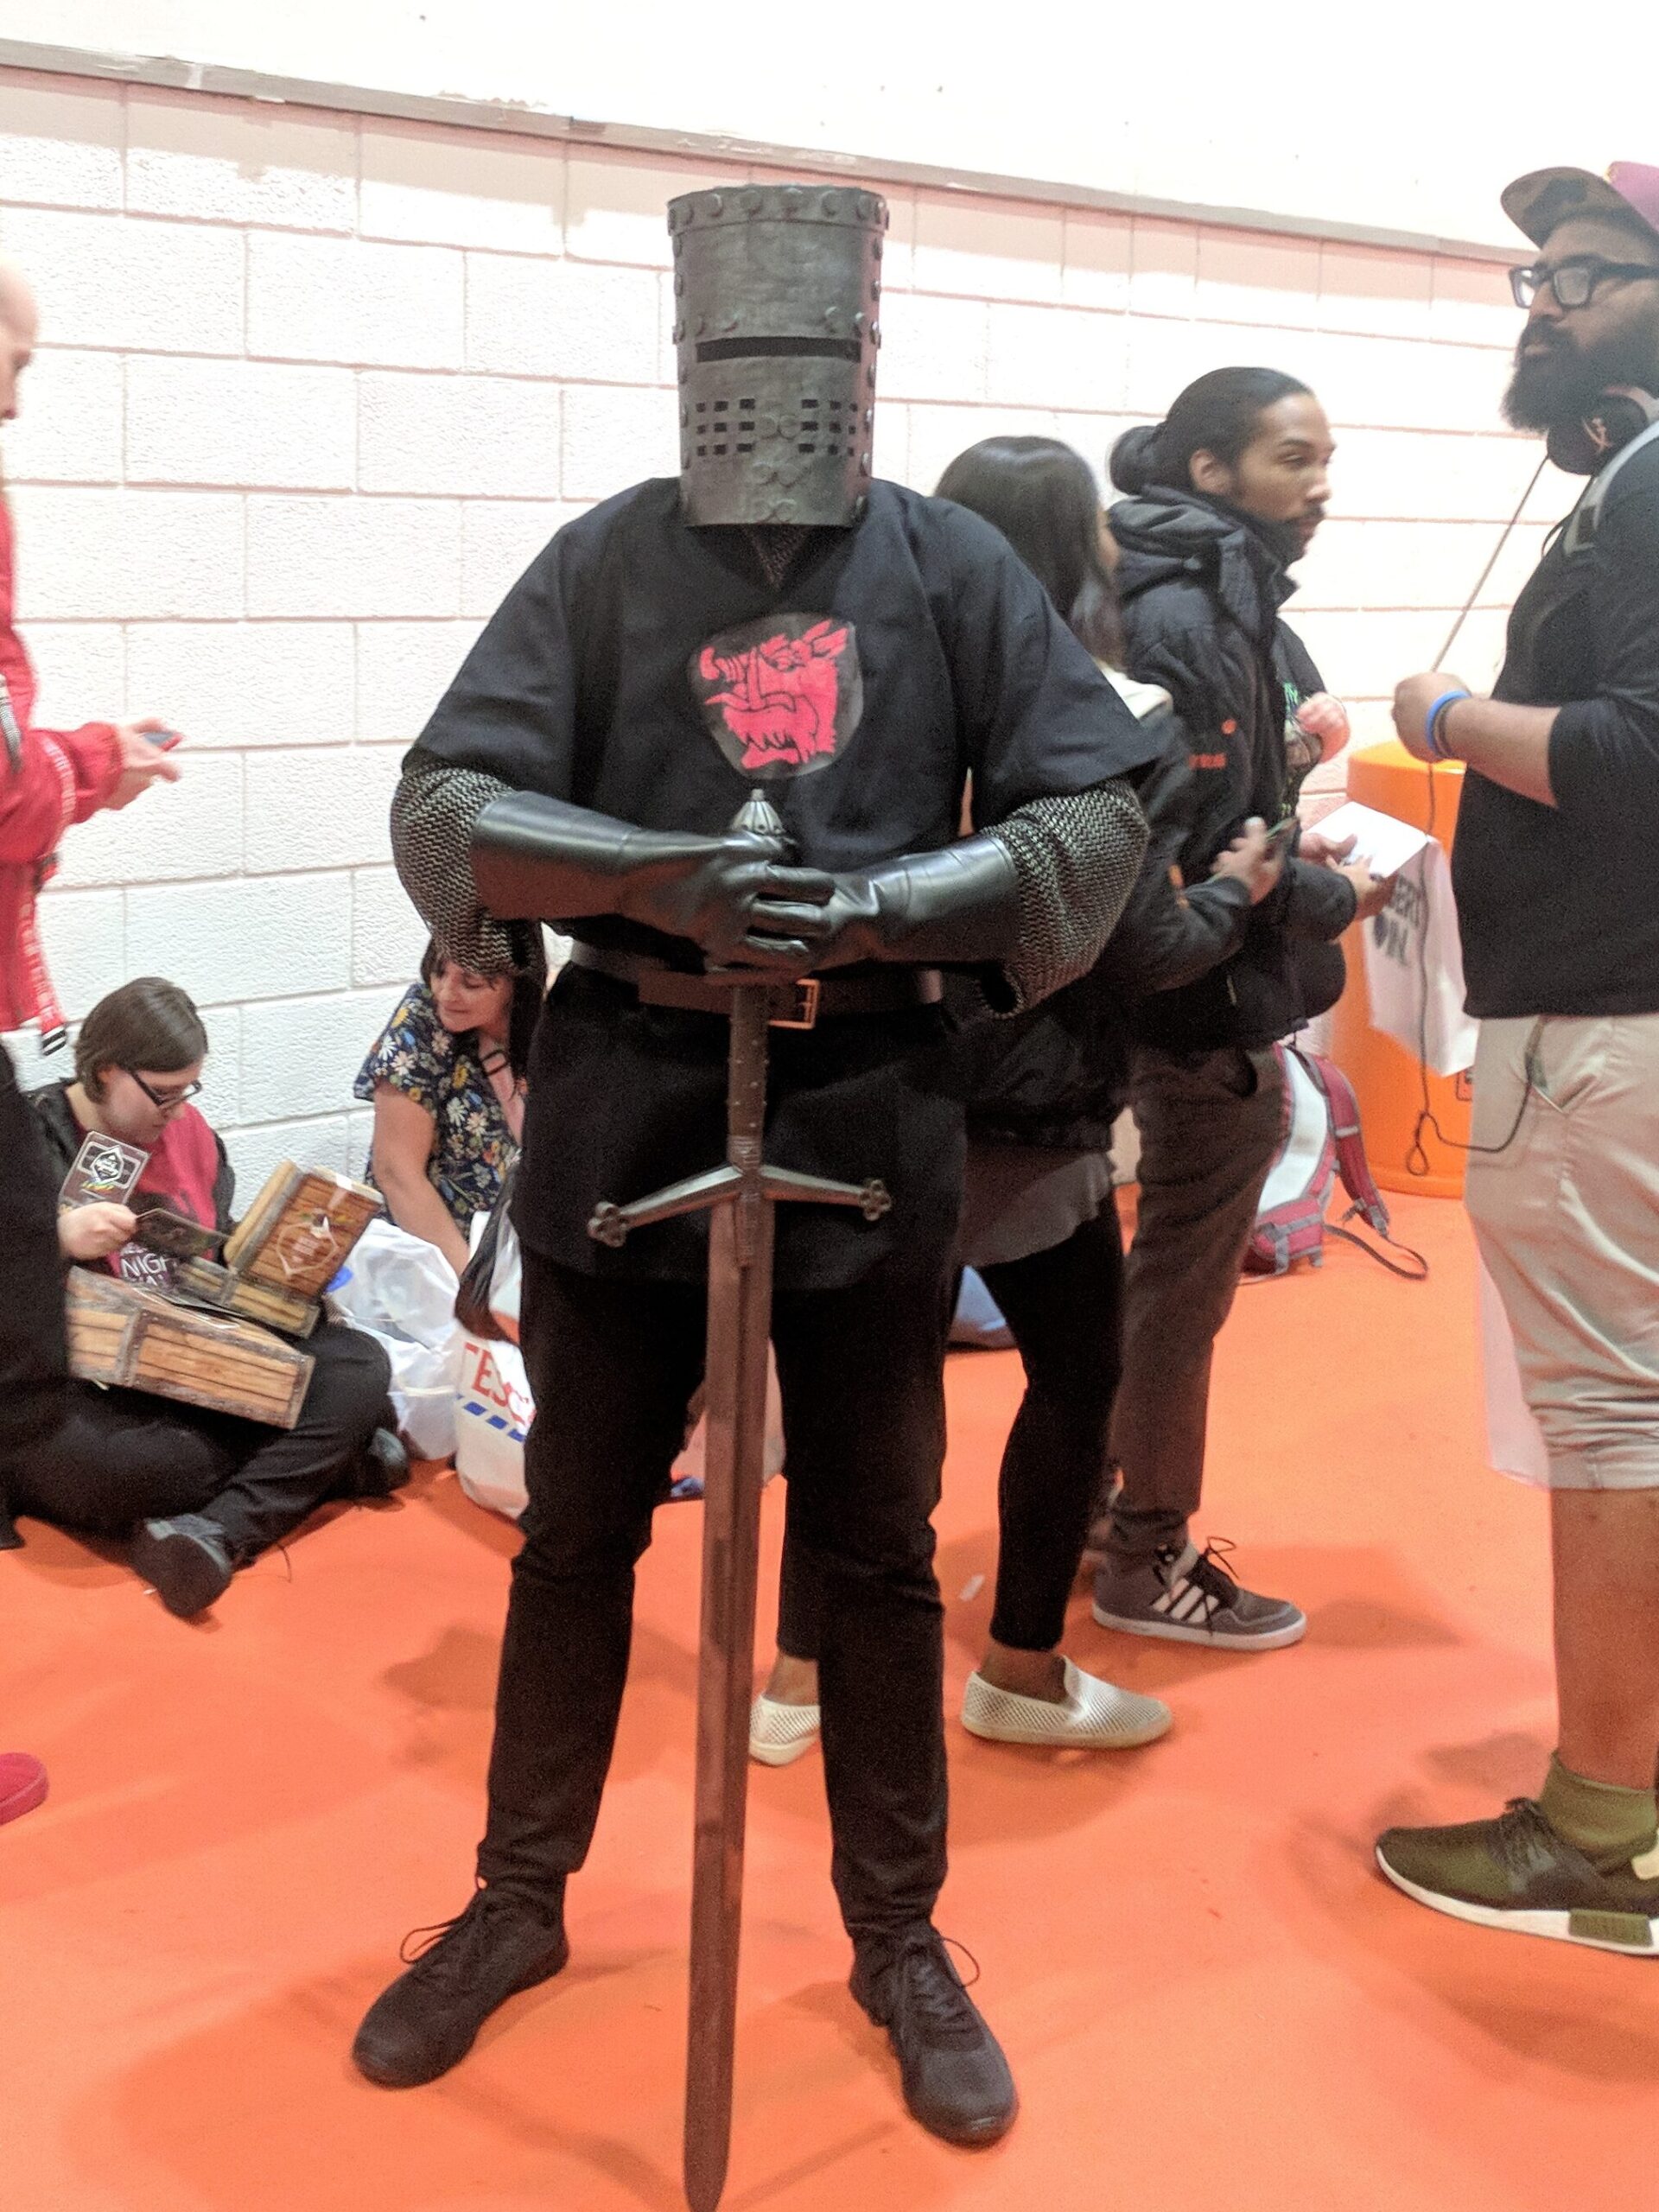
The remainder of the costume was purchased, including a costume chainmail shirt, faux-leather black gloves, and a LARP-safe sword as close to the Black Knight’s as I could find. The brown belt, black trousers and shoes I already had.
The costume was fun to wear, and got a fairly positive response at the convention. The visibility from the helmet was quite good, considering, however with the outer plastic layer it was heavy and did not take long to become uncomfortable to wear. If I were to remake this costume again, I would definitely use two layers of 3mm foam for a lighter and more comfortable helmet, even if it would sacrifice the rigidity the plastic provided. I would also try and hand-sew the tunic design, as it was a single colour and not too intricate to create, given time.
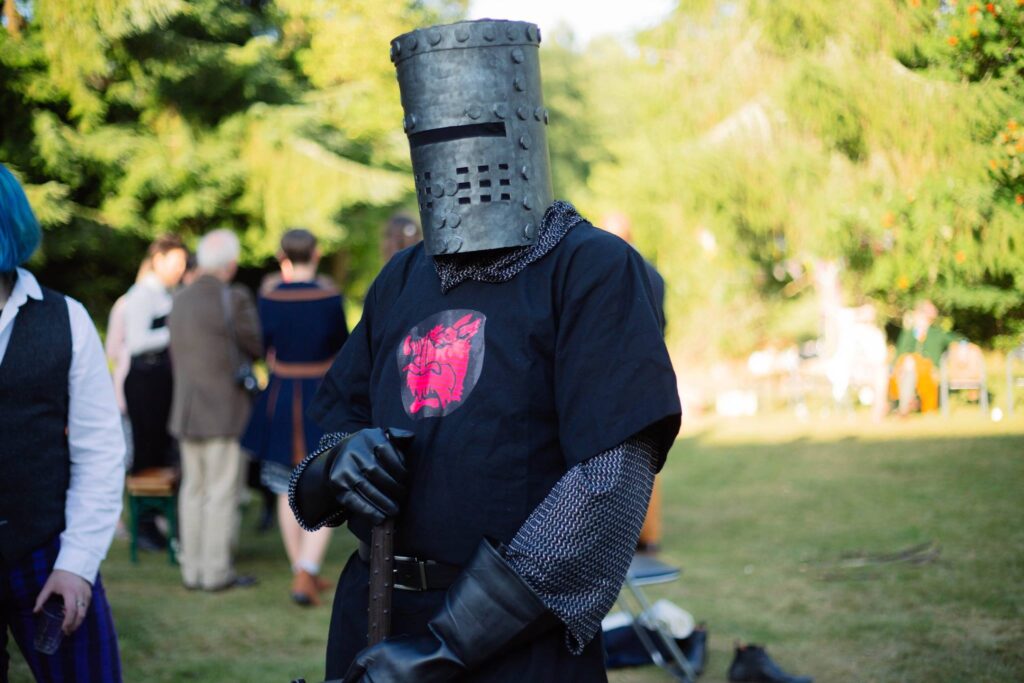
As a bonus, two friends of mine had a fancy-dress themed wedding a few months later on a bridge in a Scottish glen, and given a bridge in a natural setting the Black Knight cosplay was a must (despite the logistical challenge of getting it across the country intact).